Wednesday 26 March 2014

MAC See Sheer Lipstick

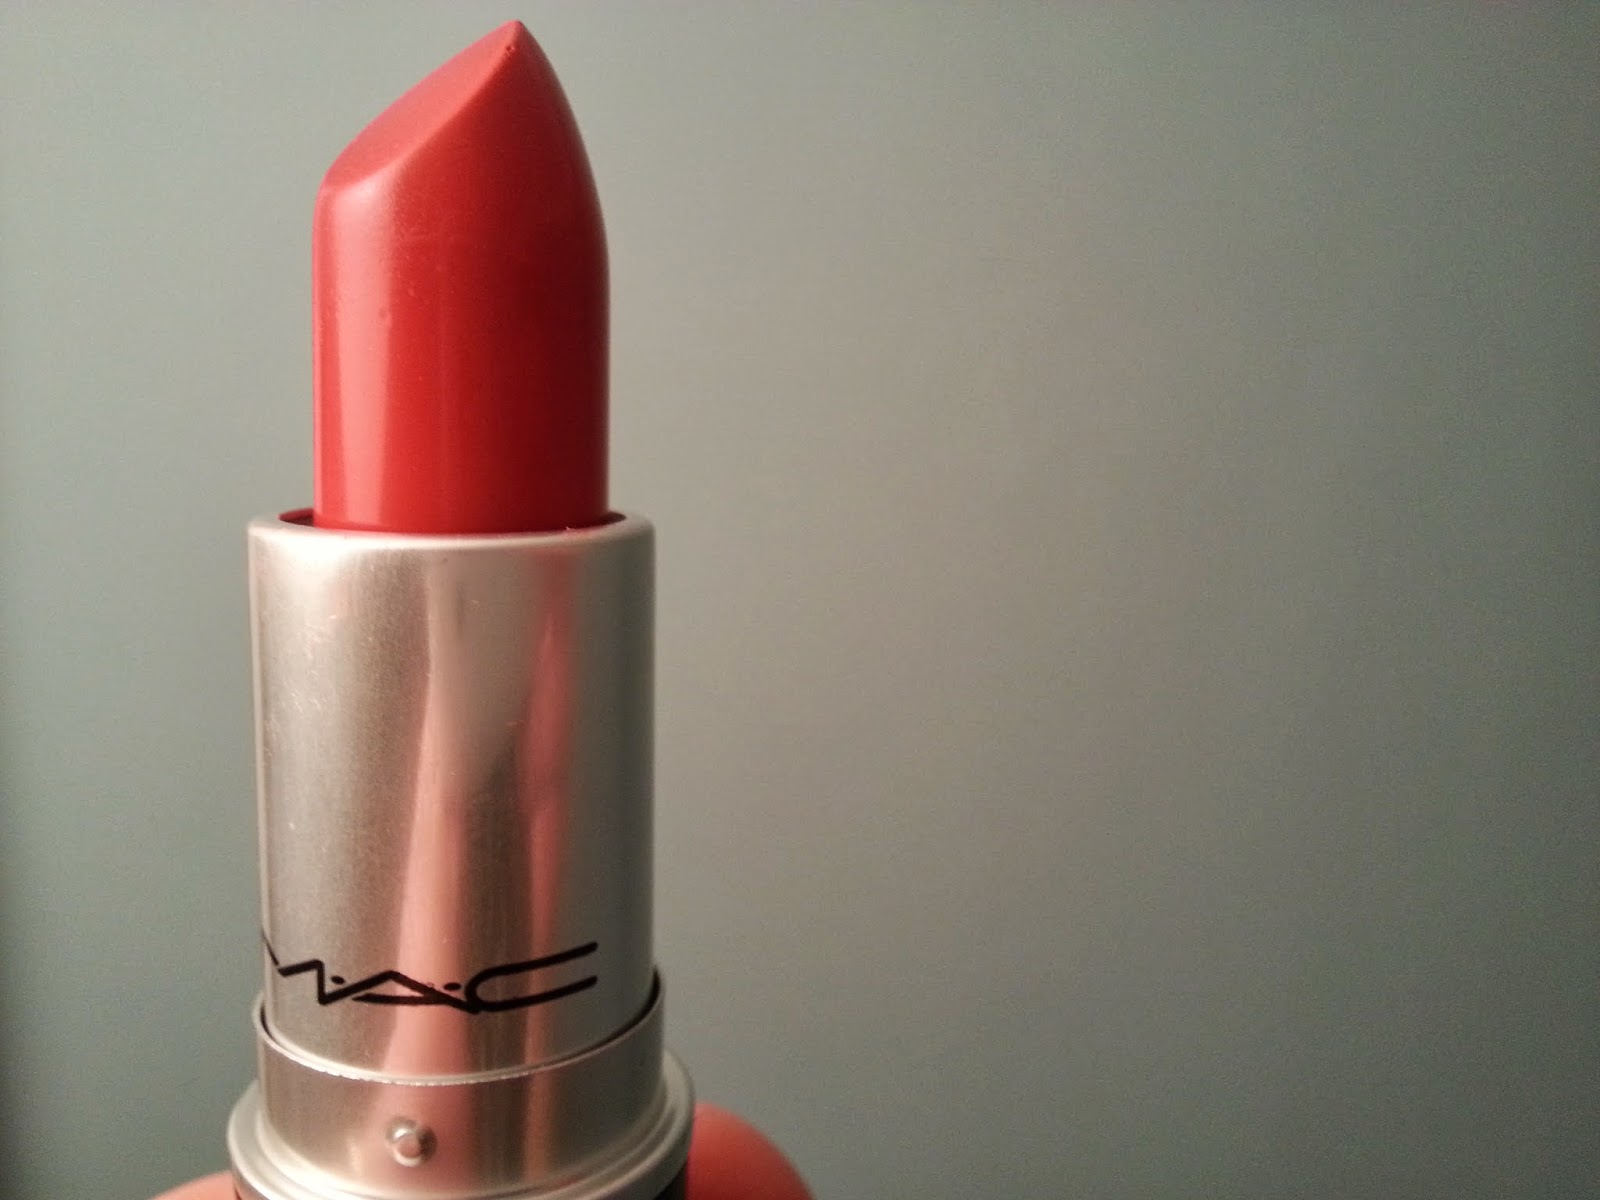
If you are looking for the perfect Spring/Summer lipstick...look no further, for I have found the one.  It comes in the form of MAC See Sheer, the newest lipstick to my small MAC collection.

MAC See Sheer Review Swatches

I have had a voucher burning a hole in my purse since Christmas.  It was my Debenhams Beauty Club voucher, and I had £15 to spend - just the amount for a MAC lipstick.  Coincidence?  On their Mega Week (I used to work at Debenhams, I don't know if people outside of Debenhams call it Mega Week, but the discount across the whole store for a week when you work in Debenhams is called Mega Week and it's an all hands on deck week...anyway...) I stocked up on a few bits with my standard money, and treated myself to my third MAC lipstick with my Beauty Rewards!

MAC See Sheer Review Swatches

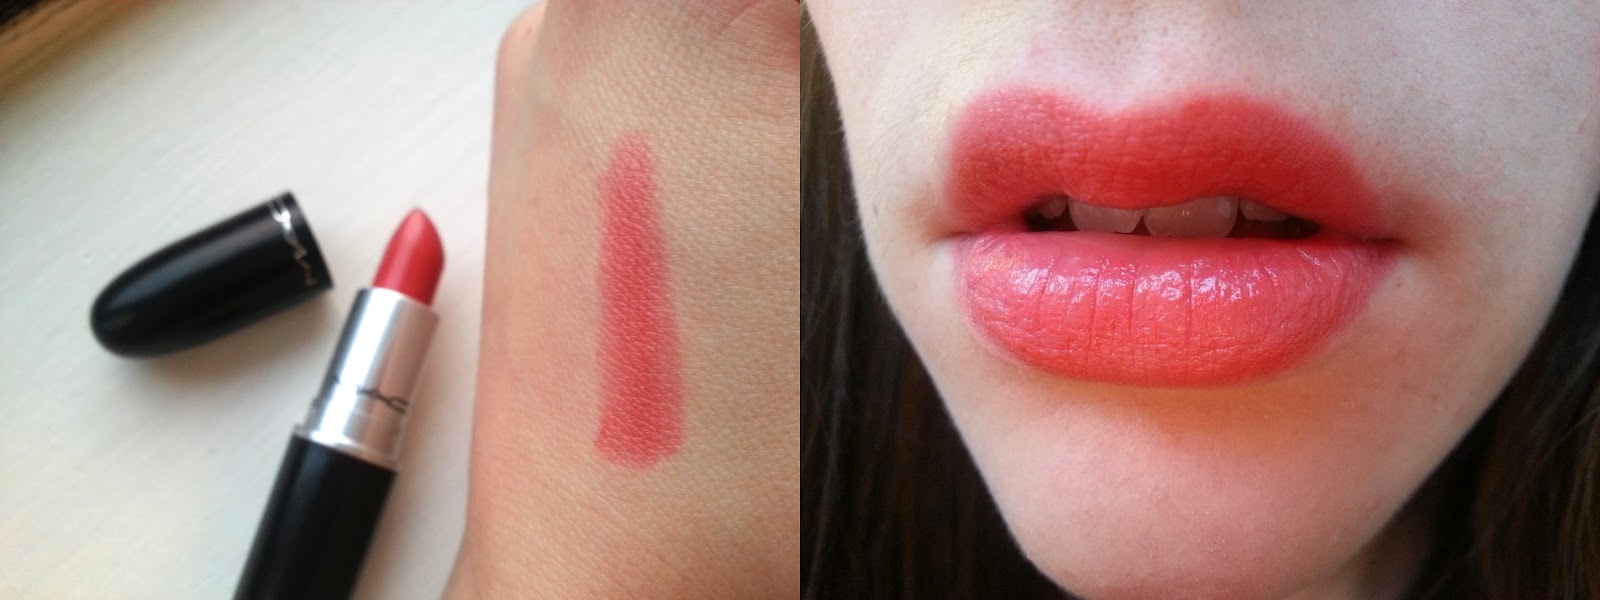
I chose See Sheer, which is described as a grapefruit pink.  I think it is a perfect balance of red and orange, and seems to have a touch of brown in the bullet, but it really is so nice once applied.  See Sheer is a lustre finish, so it doesn't have a massively long wear time, and it is quite sheer, as the name suggests.  But at the same time, this colour is easily buildable so you can get a more peachy pink punch to your lips if you wanted.  It's ridiculously easy to apply, especially on the go.  Because of the lustre finish, it's not as essential to use a mirror, so just crack it out and get going.  The above photo on the lips is applied quite liberally, and the photo below shows the lipstick blotted.  If you compare the below photo to my lips in yesterdays post, you'll really see the difference as it looks very sheer below!

MAC See Sheer Review Swatches

I have been reaching for this alot recently, and wearing it both through the day and in the evening.  It's the perfect shade for Spring and when it's on, it's really moisturising on the lips and the finish has just the right amount of shine - not too shiny, but not too matte yet you definitely know it's there.  One thing I did find though, was when this shade had worn off, it did leave my lips a little dry which is unusual as I have another lustre lipstick and that shade doesn't do that to me...maybe I was just having off day!

I actually won a MAC lipstick this week, amongst some other goodies too so expect another MAC lipstick review up soon!

What is your go to lip product?  Do you have a favourite shade from any brand I need to try?

Tuesday 25 March 2014

Clinique Cheek Pop in Ginger Pop

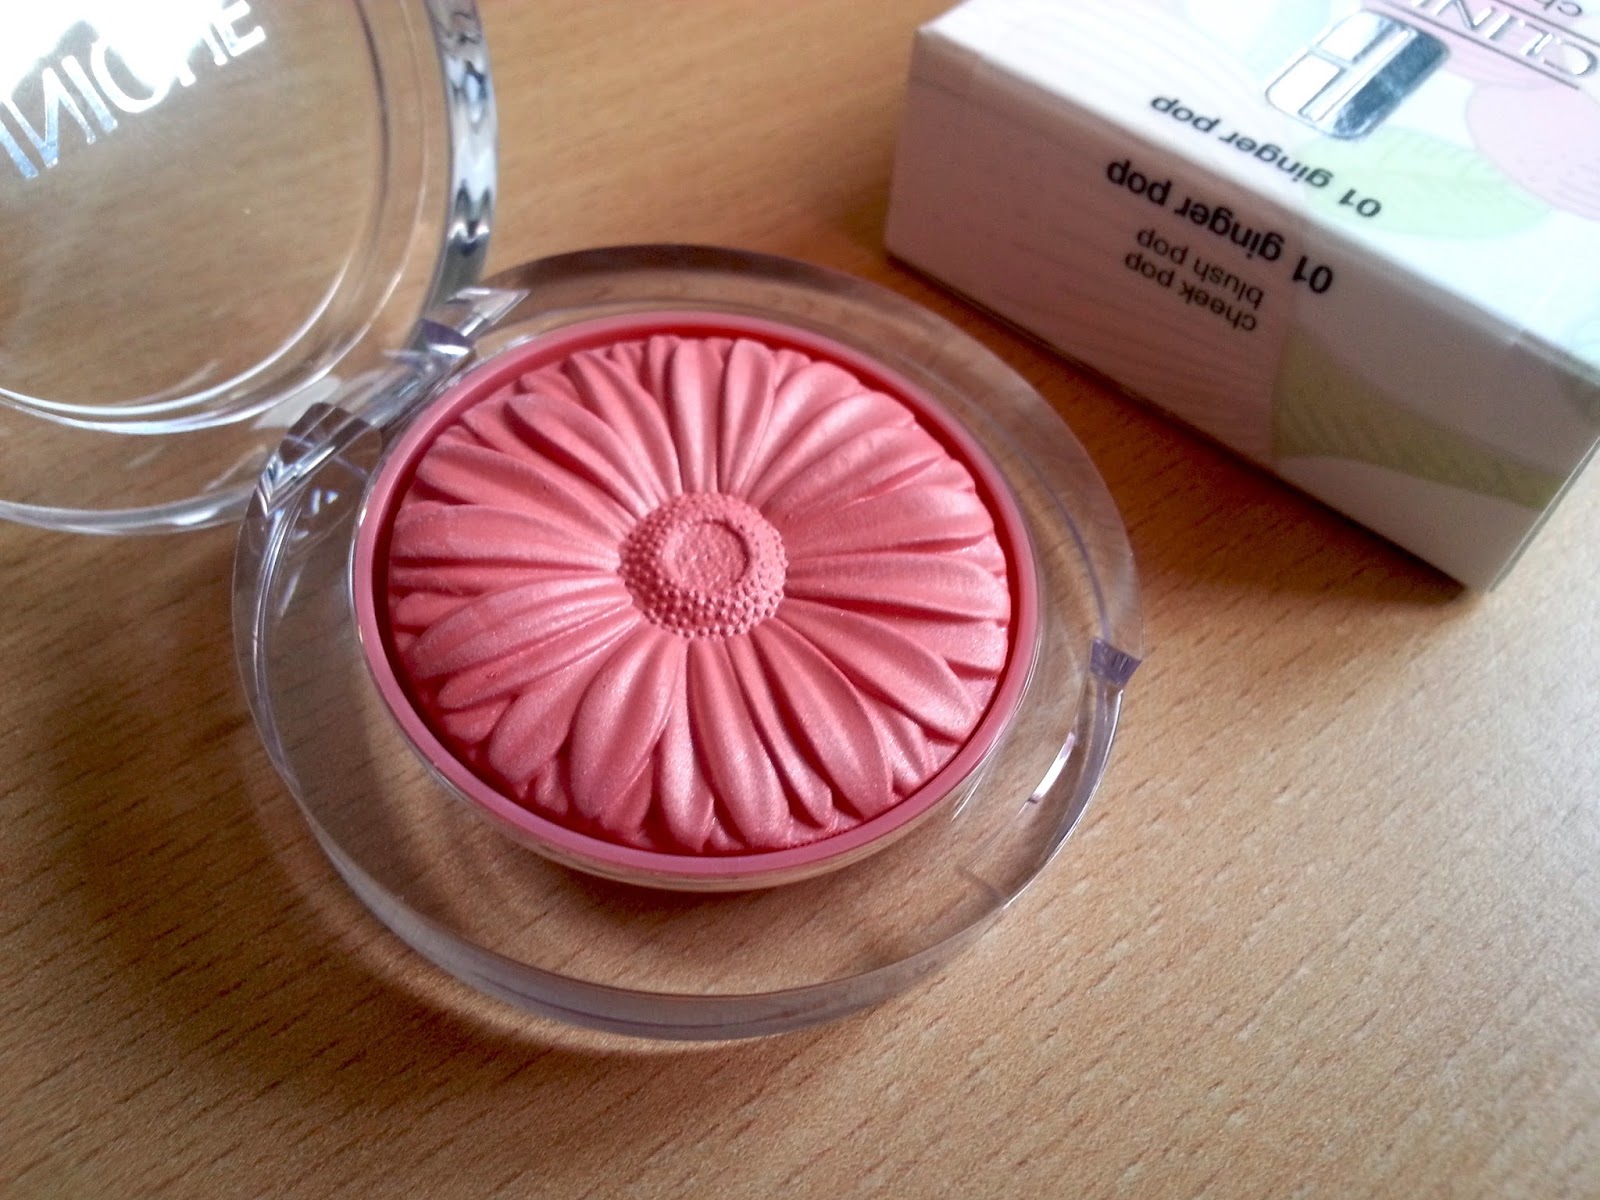
Way back in January, I was wishing hard for the release of the new Clinique Cheek Pops; in fact, I wanted two - Peach Pop and Berry Pop.  The Cheek Pops were finally released last week, and at the weekend, I raced to Browns department store to spend the voucher I'd been saving since Christmas, and actually picked up two products, one of them being this beautiful blush!

Clinique Cheek Pop Ginger Pop Swatch Review

I spent ages swatching in store, and comparing with Liam which one he thought was best.  The two that I originally wanted were so pretty, but also really bright - very Spring/Summer, but I wanted something that I could wear daily that was still pretty, but gave a natural glow.  Liam and I both thought that Peach Pop and Ginger Pop were near enough identical when swatching on the hands, but Ginger Pop had a touch of bronze to it, so gave a really healthy, natural glow when applied.

Clinique Cheek Pop Ginger Pop Swatch Review

The Cheek Pop is like no other blush I own.  It's housed in clear packaging, with a beautiful embossed gerbera as the blush itself.  It is a kind of powder/cream blush hybrid, it's so creamy and perfect, but not a cream and not a powder either!  It's just really velvety, and looks really natural when it's applied.

Clinique Cheek Pop Ginger Pop Swatch Review

The colour is really easily buildable.  Where as other blushes, I'd probably just stick to one or two swirls, this took quite a bit to get a real pop of colour onto the cheeks.  But your standard swirling would get you a really natural flush of colour.  I sound a little negative here, but I really, really love it.

I've never tried anything from Clinique before, but I'm so pleased with my first ever purchase.  I hope that these become a staple in their cosmetic collection, and that maybe they release a few more colours!  But for now, Ginger Pop will definitely be seeing me through the warmer months!  If you'd like one, they're available at all the Clinique counters now, or online here for a reasonable £16.50!

Have you tried the Cheek Pops?  What's your favourite shade?

Monday 17 March 2014

Easy, Healthy Lunch Idea: The Fajita Salad

Working in the middle of a field really does have it's benefits; fresh air, nice views from the office and most importantly, no shops nearby so I can't nip out and get a sneaky Subway for lunch.  I make a packed lunch every evening right before I go to bed, so that I get maximum sleep time and just so it's done and out the way.

Recently, as we know, I've been trying to make a lifestyle change.  Whilst I've got going to the gym down, and I'm sorted on the fitness side of things, my eating habits definitely need some work.  I've been trying really hard to eat well whilst I am at work.  I usually have a sandwich or a wrap, but it gets a bit boring and there are more healthy options to be had!  I'm a bit of a salad dodger - I can think of a million and one things that I'd rather eat than a salad.  And I always end up hungry through the afternoon.  I wanted a lunch with all the healthy bits in a salad, just...nicer.  I'm quite good at throwing things together and hoping for the best, but here I am writing my second recipe post which is this fajita salad - all the ingredients of a fajita, but without the high calories.

Easy Healthy Packed Lunch Idea Recipe

You will need...

           35g BROWN BASMATI RICE
           CHICKEN BREAST
           SMALL RED ONION
           1/2 RED PEPPER
           1/2 YELLOW PEPPER
           1/2 TOMATO
           2 CLOSED CUP MUSHROOMS
           HANDFUL OF SPINACH
           GROUND CUMIN
           HOT CHILLI FLAKES (OPTIONAL)

Weigh out your rice - it's so easy to go overboard on rice, so weighing it out is the best way to ensure a perfect portion for lunch.  On the packet, it's usually 75g of rice for a portion, but seeing as this is just a lunch, I halved my portion and found it to be just right.  It's important to get brown rice, because it has a low GI meaning that it will keep you fuller for longer, and it's just better for you than white rice!  You'll want to put your rice on now, as this takes the longest to cook - usually around twenty five minutes.

Easy Healthy Packed Lunch Idea Recipe

First things first, you'll need to chop all your ingredients.  I sliced my onions and peppers into fajita style slices, sliced my mushrooms and diced my tomato.  My chicken breast was ready chopped, but if yours isn't, just roughly chop your chicken into bite sized pieces.

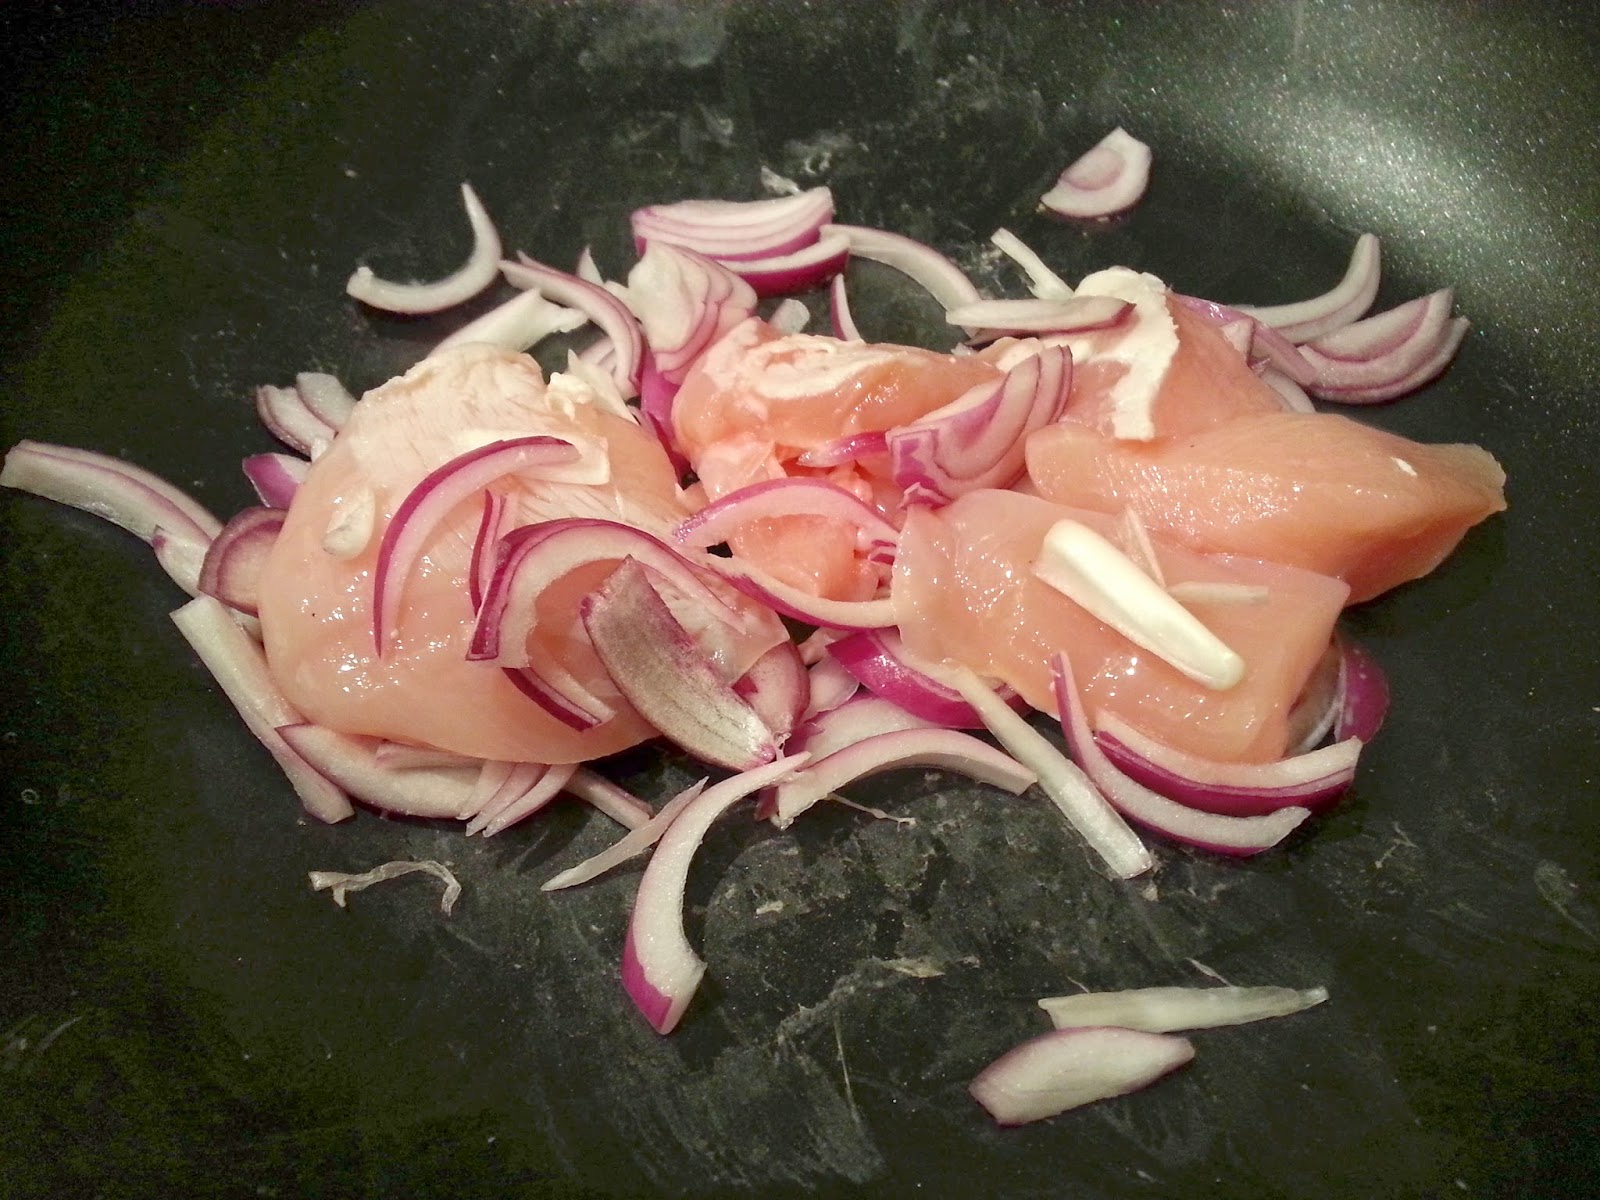
To avoid extra calories, use a non-stick frying pan so that you don't need to use oil!  I dry fried my onion and my chicken breast.  If you absolutely must use oil, try using the spray one calorie oils to make sure you don't go for it on oil.

Easy Healthy Packed Lunch Idea Recipe

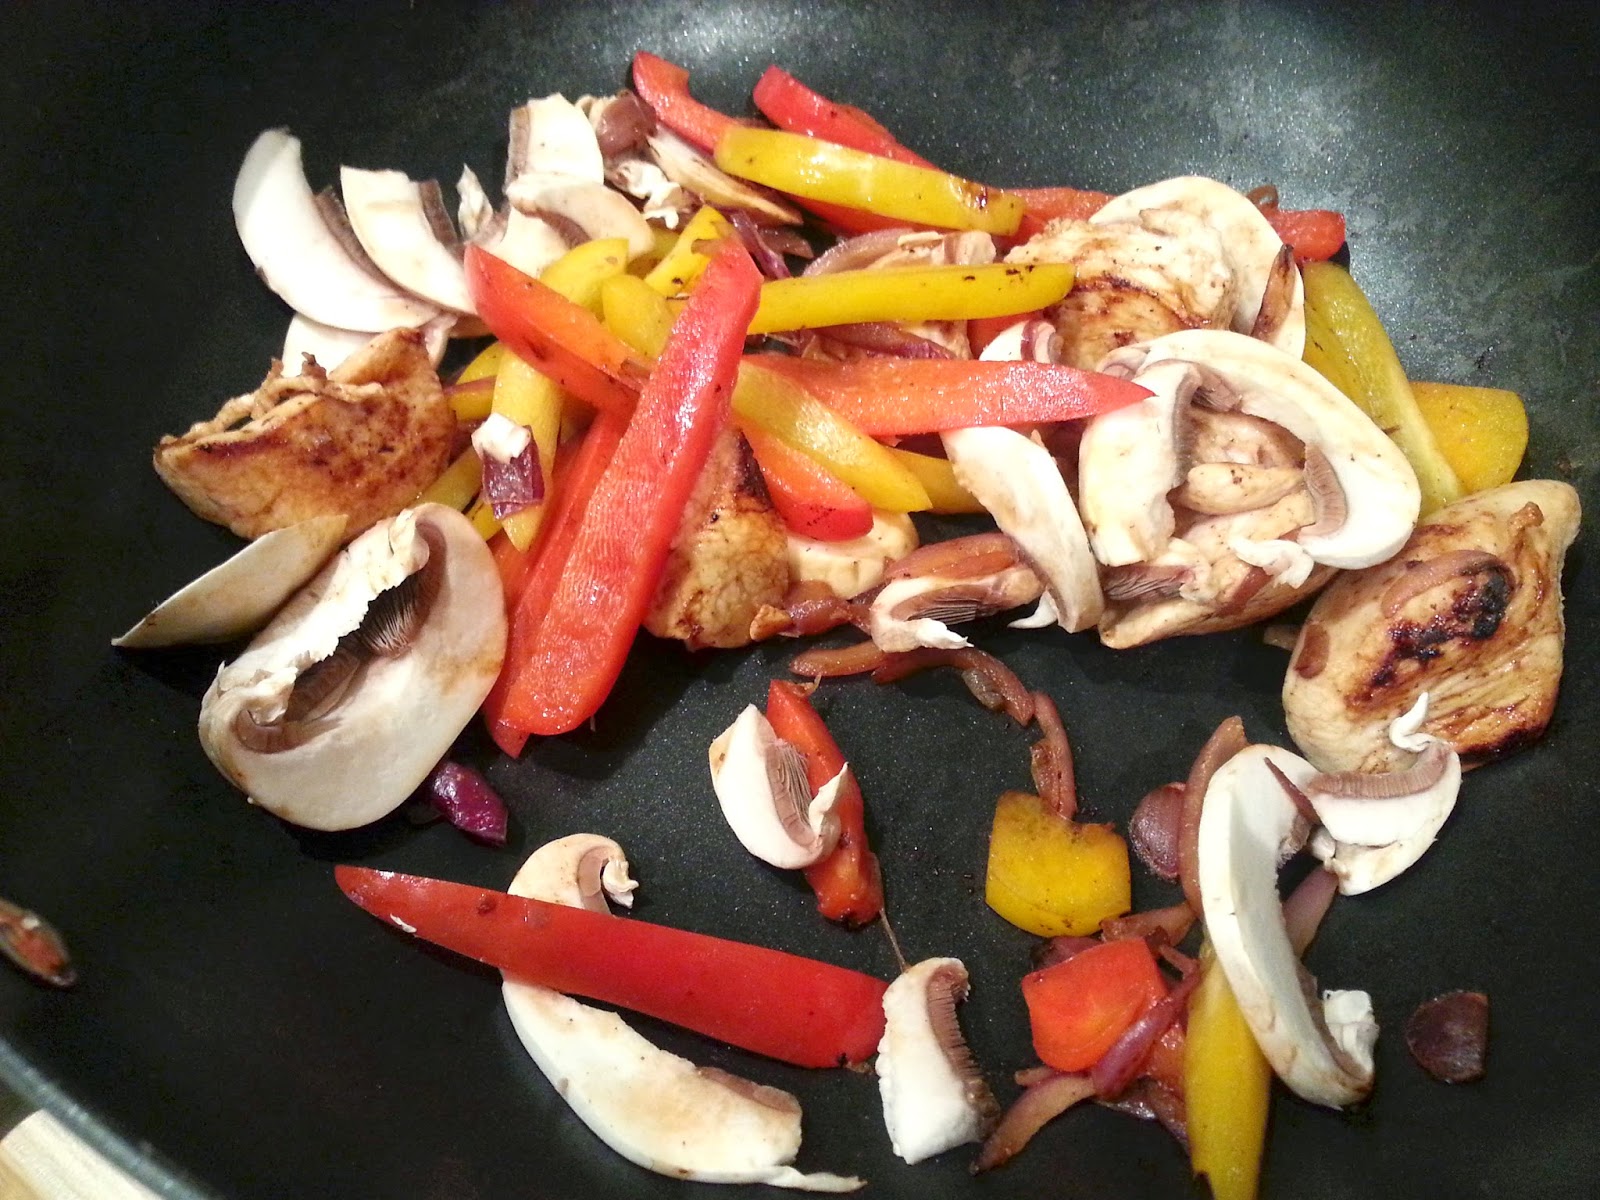
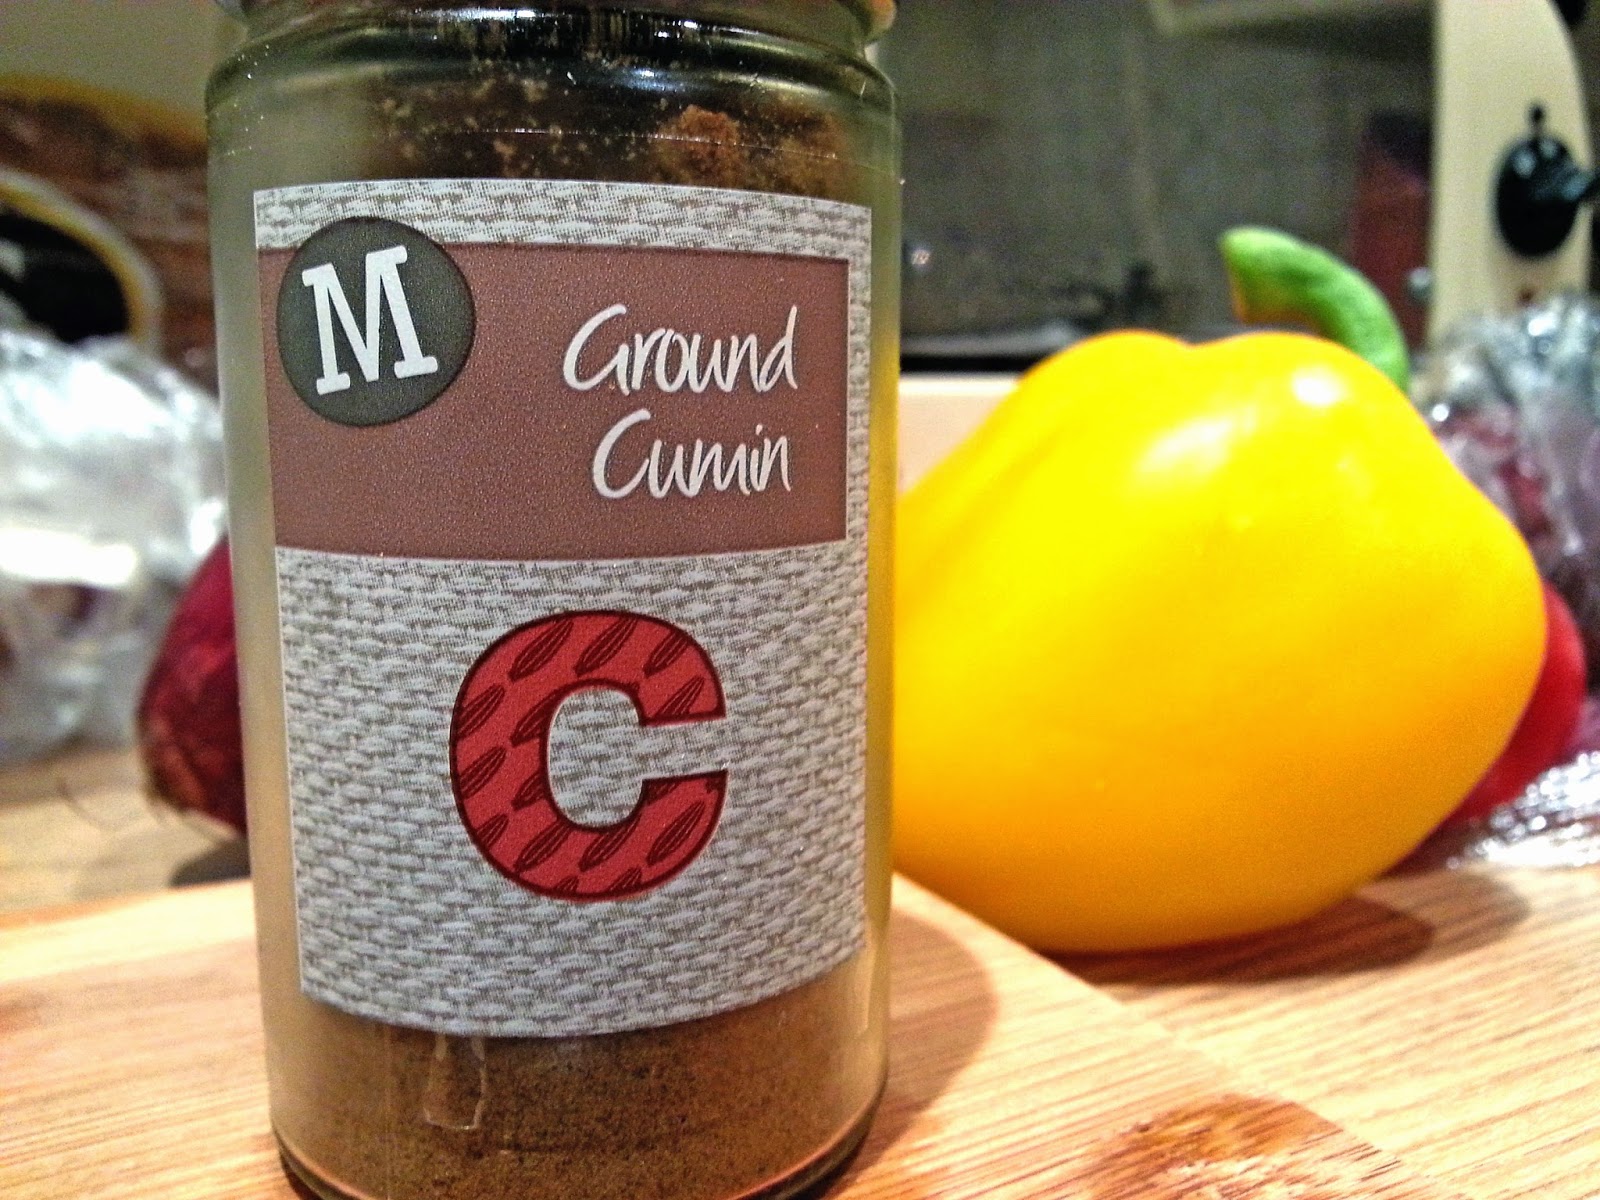
Add your peppers and mushrooms to the pan and stir fry until they soften.  I add my diced tomato last just as a bit of an extra flavour.  The main part to the fajita flavouring is your ground cumin.  If you give this a sniff, it's just screaming fajita to me - I give this a good sprinkle across the ingredients and stir in.  If you are wanting a little extra spice, add some hot chilli flakes or some fresh chillis.  Remove the pan from the heat and wait for your rice to finish cooking!

Easy Healthy Packed Lunch Idea Recipe

Easy Healthy Packed Lunch Idea Recipe

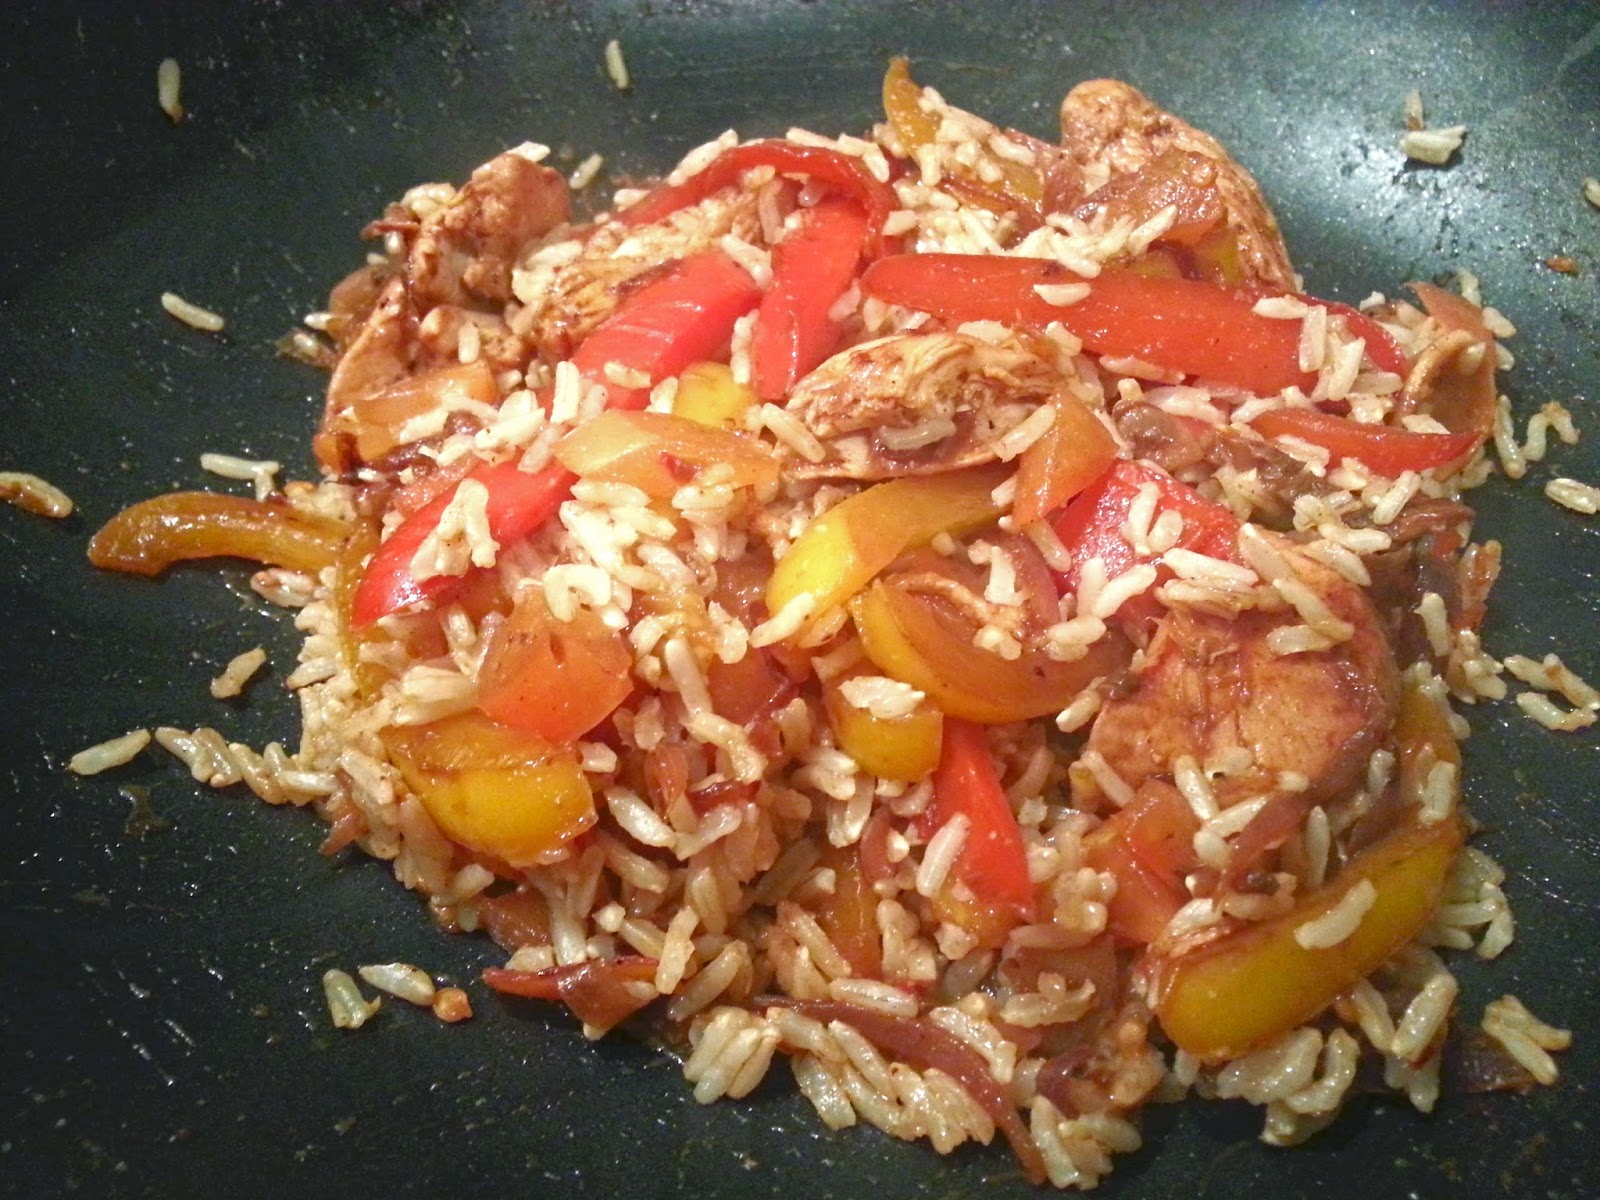
When your rice is done, drain and rinse with boiling water to get rid of all the starch.  Add your rice to your fajita pan, and stir in to mix with all the ingredients and coat it with the fajita flavour.

Easy Healthy Packed Lunch Idea Recipe

Put the pan back on a low heat, and add a handful of spinach.  Stir until the spinach has wilted slightly and then remove from the heat and put in your lunch box to cool.

Easy Healthy Packed Lunch Idea Recipe

You can eat this cold, but I prefer to reheat mine again at lunch the next day.  I literally don't know how I would make this an amazing food photograph, but you'll just have to trust me that it's nice!  I always get compliments on how good it smells, and not to blow my own trumpet, but it tastes pretty damn nice as well!  The best part that it is really filling and comes in according to My Fitness Pal at just 270 calories!  If you wanted to, you could also serve this with a bit of guacamole on the side!  You can find my recipe for that here.  So there it is...my one pan, low calorie lunch wonder.

What's your favourite thing to eat as a healthy lunch?  Will you try my Fajita Salad?

Sunday 16 March 2014

Coming Soon: Tarte on QVC

This month we found out that Sephora now ships to the UK.  The only thing that I could possibly think that I needed to try were the Tarte Amazonian Clay Blushes.  I browsed the Sephora website, but couldn't bring myself to splash out £75 on things I might like to get a flat £10 delivery charge.  Luckily for us UK girls, QVC have answered our prayers and a selection of the Tarte range is making it's way to the UK on the 28th March!

Aside from my picks which I'll talk about in a second, there is a really good range to give us all a good taste of Tarte.  The packaging is amazing, the products are said to be perfection and I'm way too excited.  I've never bought anything from QVC before, or anything from the TV in fact, but I just can't bring myself to miss the opportunity to get my hands on some of the most coveted Tarte products!  The Tarte range is priced in the higher end of the scale, as you'd expect, but I think it's a fair price to pay.  There's also some real bargains in there - you can find a set of three Amazonian Butter lipsticks for £20, as well as the Sultry Sunset Amazonian Clay Eight Shadow Collectors Palette for £24!  I could put the entire QVC Tarte range in my basket, but I've narrowed it down to just three products...although one product appears four times - I know, what a cheater!


The Amazonian Clay Full Coverage Air Brush Foundation (£27.34) is "an airbrush foundation which delivers flawless, natural coverage that lasts, while invigorating tone and texture for youthful looking skin."  I've read lots of reviews on this, and it seems to be perfect for my oily skin.  The mineral powder makes this into a mattifying foundation, which is easily buildable on the coverage side.  It also comes with a really stubby, dense kabuki brush designed to really buff this into your skin for a flawless finish.  The only downside to ordering from QVC is that I don't know which shade would best match my skintone, so it'll be a risk that I'll just have to take!

I also picked the Amazonian Clay Waterproof Brow Mousse (£16.20).  I've not been blessed with huge brows, and the ones I've got are a bit patchy because I got carried away plucking them when I was younger.  I usually just use the Rimmel Eyebrow Pencil to fill in any gaps, but I often find that my shade (dark brown) is way too warm and often comes out auburn compared to my actual brows.  Pencils can also be quite harsh and unnatural, so I'm looking forward to having the chance to try a different type of brow filler.  I've never used anything other than a pencil, so a brow mousse would be nice to try and hopefully would be ideal for making a natural brow.

Of course the Amazonian Clay Blushes (£26.50) would had to make an appearance.  If I ever go back to America, I always said I'd pick up two shades which would be Tipsy and Exposed.  However, recently I've spotted Natural Beauty which is a gorgeous red toned blush that I think would be a pretty close match to my natural flush and would be perfect for bringing some colour to cheeks in the colder months and Flush which is an amazing berry toned blush.  Tipsy, a beautiful coral shade is gorgeous for the warmer months and Exposed is an amazing natural toned blush, which whilst it looks pretty brown in the pan is ideal for no makeup makeup days or a natural contour.  

I doubt I will pick all four of these up, but it'l be a tough call to choose which ones make the cut!  Essie Button recently did an amazing post where she swatched all the Tarte blushes she had, and all of these shades are there if you wanted to investigate the shades for yourself!

Will you be picking up anything Tarte from QVC?  What's on your Tarte Wishlist?

Thursday 13 March 2014

Making A Change: Growing To Love The Gym

I'm back with a third update on my 'I'm going to be healthy' journey.  It's not a particularly inspirational one mind, as I am still over the weight I was when I started!  When I started way back in December, I weighed twelve stone.  Despite joining the gym before Christmas to limit the damage, I still ended up gaining five pounds which I was not exactly surprised over, but disappointed none the less.  To make things worse, I then had a week off work, and all efforts turned into a total binge week and I think at the end of the week I managed to weigh a pretty tidy twelve stone ten!


Since then, I have now lost six pounds and am now on the balance of weighing twelve stone four or five so I'm still classed as overweight.  I am currently aiming to go to the gym five times a week, and no less than four.  I am finally in the routine of going to the gym now, and it doesn't feel like such a chore anymore and is just part of my routine.  Liam always says to me that if you do something regularly ten times, you'll learn to love it and whilst I don't want to admit it, I think he might be right!

Recently, I've been finding it so hard to stay motivated to do anything.  I've been going to the gym, training hard, and eating averagely well but things aren't happening as quick as I would like.  How silly does that sound...I know that weight loss doesn't happen overnight, or even over the two weeks where I have been really expecting it.  I just thought I would have seen more changes having gone from doing no exercise, to exercising regularly.

Physical Living 

If you hate the gym as much as I do, I really recommend doing group exercise instead of roaming around the gym deciding what machine to go on next.  It's so much more interesting and, dare I say it, fun working out as part of a group.  My absolute favourites are the Body Combat and Fight FX classes, which involve punching and kicking routines with some pad and mitt work in!  I also take part in HIIT, VIPR, Kettlebell, Body Pump and Yoga classes every week Monday to Friday.  Everyone works together, and the class leaders are really motivational and enthusiastic about what they do, it's hard to not get into what you're doing.

I go to the gym alone every single time and it can be dauting stepping foot into a studio where everyone has come with their friend, especially when you have to do some group work - there has been more than one occasion where I've had to work with the class leader, but I always get the best workouts being paired up in that way!

Putting in all this effort and not losing any weight is definitely saddening.  But I have made a lifestyle change; as long as it comes off eventually, I don't care how long it takes.  Muscle also weighs more than fat does, so even though I have maintained my weight, I have in fact lost inches off my body.  A loss is a loss - don't get disappointed by the scales; keep track of your physical measurements!  Find something to work towards; my Dad is getting married in April, and I am planning a holiday for July so this will also help to keep me motivated!

What are your tips for staying motivated at the gym?  Do you prefer gym or home workouts?

Wednesday 12 March 2014

La-Roche Posay Effaclar Duo+

La-Roche Posay Effaclar Duo has always been a product that I've wanted to try, but for some reason or another, never actually got round to buying myself one.  In fact, I sat and watched in jealousy as my boyfriend got his mitts on a tube and occasionally pinched some of his when I went over.  When I was offered the chance to try the new and improved La-Roche Posay Effaclar Duo+*, I obviously jumped at the chance.

La-Roche Posay Effaclar Duo+ Review

Effaclar Duo+ is said to help with acne and blemishes, oily skin and clogged pores as well as correcting and preventing red and dark marks caused my damage to the skin.  Some big claims for such a little tube of product, and a tube of product that is just ideal for my skin concerns.  I am regularly battling break outs, left with red marks because I'm a self confessed picker and across my nose and cheeks I have particularly bad blocked pores and as well as all that, my skin is so oily by the afternoon you could heat my face and fry an egg on it.  Okay, so I might have been a little dramatic with the how oily my skin is, but it's not fun fighting the shine.

I've used this product for around a month now, and I've been really impressed!  My skin really does feel clearer and I've had far fewer break outs than I did prior to use - if I did have any blemishes, they were literally tiny and barely worth anything.  As well as the reduced number and size, they didn't linger for long at all and I feel like my skin is looking pretty damn good on my face at the moment!

La-Roche Posay Effaclar Duo+ Review Blemish Treatment

As we all know, I get acne and blemishes on my body as well as my face.  In fact, my body is worse than my face.  I used the Effaclar Duo on my chest when needed, and it really helped to reduce the appearance of any spots and blemishes.  It also dramatically reduced the pigmentation left behind from older spots, which I was really pleased with because it's quite embarrassing and saddens me that such a feminine area is ruined by spots and scarring.

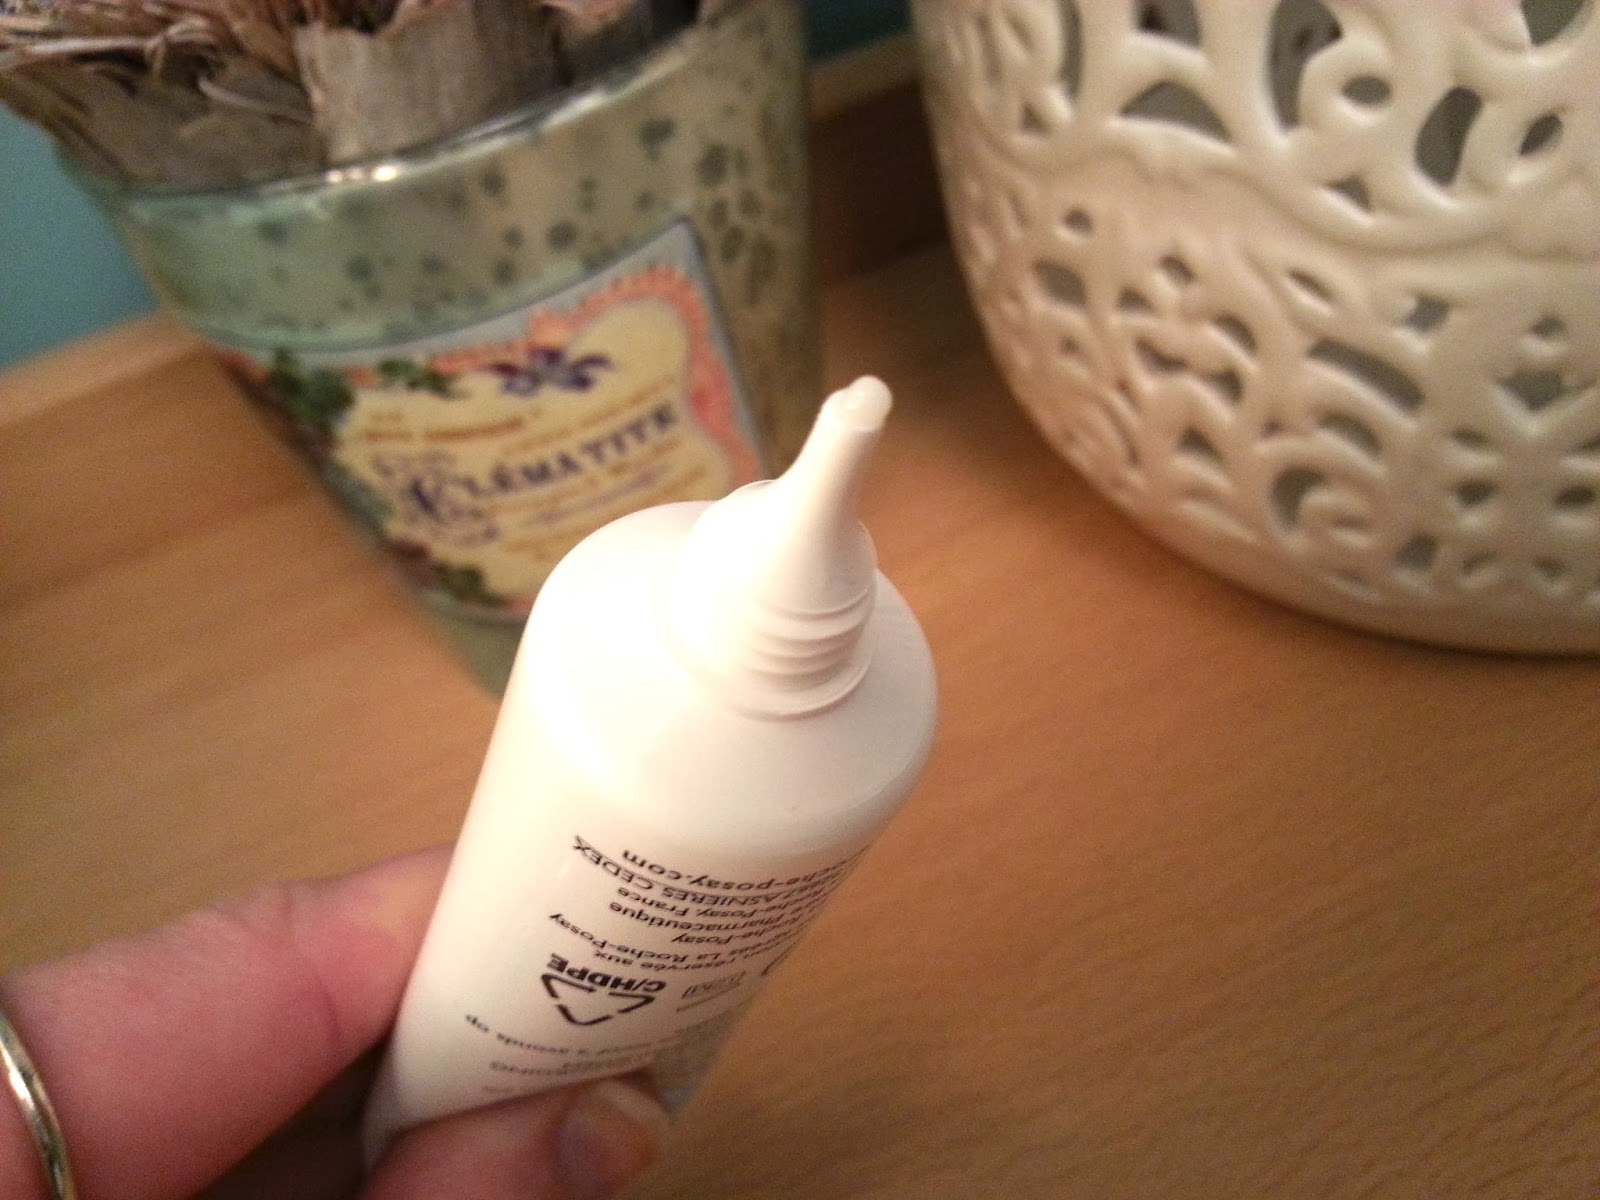
From what I tried of the original Effaclar Duo, I think that Duo+ is a little thicker in consistency and feels like a serum on the skin.  It glides on and is absorbed really quickly.  It can be used alone, or alongside your daily moisturiser.  Alone, it makes an amazing base for foundation and acts as an amazing primer for a flawless finish.  I did still get oily throughout the day, but I don't think it was half as bad as what it was before I started using the Effaclar Duo+.  It also has a gorgeous rosey scent that disappears quite quickly, which I'm a little sad about because I really love it!

La-Roche Posay Effaclar Duo+ Review Blemish Treatment

I've loved using this product, and I'll definitely continue to buy it.  As with everything that helps with acne and scarring, I'd love to have a body product that can help me with my back problems.  I could one hundred percent use this on my back, but because it's a large area and a small tube, I'd be stocking up probably weekly!  Escentual have an offer on all this month across their French Pharmacy which means there's an amazing third off La-Roche Posay.  Effaclar Duo+ costs you just £10.33 instead of the usual £15.50, and I promise you that if you suffer with your skin, this is one hundred percent worth it even without the discount!

Have you tried any of the Effaclar Duo range?  Will you be picking this up?
*Effaclar Duo+ was sent to me for review.

Thursday 6 March 2014

Spring Skin Wishlist with Nuxe

Spring is well and truly on its way!  I can now make it all the way home after work without the need for using the headlights on my car - how sad is that...measuring the seasons on my car lights...get a life, Carly!  Anyway, Nuxe are currently holding a competition to create a wishlist of Nuxe products that will get you ready for Spring!  After lots of thought, here are the products I've chosen to drag myself out of the Winter blues, and get some Spring in my step!


The Nuxellence Jeunesse is first up on my wishlist.  We all make the standard beauty switches, and swap our plum lipsticks for bright corals and pinks, but the first step I think we all need to take is in our skincare.  I find the dark and cold nights really take their toll on my skin, so come Spring, my skin needs a good nudge to wake up a bit.  The Nuxellence Jeunesse is said to be rejuvinating and revitalising, promoting a good glow on the skin.  Without being too technical, this cream repairs mitochondrial DNA which helps to reveal the skins natural youthfulness and radiance.

I have continued the radiance boosting products in my cleanser, and have chosen the Nuxe Gentle Exfoliating Gel with Rose Petals.  First off, the fact that this is a gel exfoliator is already grabbing my attention.  I love gel cleansers in the warmer months, because they're so cooling and refreshing.  Combining this with a growing favourite scent, rose, this cleanser is just calling my name.  Spring skin will be revealed quickly, and will be maintained through use as this is an exfoliator that is gentle enough to be used frequently.

Probably my most lusted after product on this wishlist is the Huile Prodigieuse OR, which is a multi use dry oil.  It can be used on the face, the body or your hair, and I absolutely love the look of this.  I think it will be perfect for adding a three dimensional shine to hair, a hint of colour and sheen to bare Spring legs and would be gorgeous as a golden highlight on the top of cheek bones!  Combine this with a tan...woah, well we had better calm down before we get all Goddess-y.

The NUXE BODY Body Contouring Oil for Infiltrated Cellulite is a bit of a funny product for me.  I've never been too sure on products claiming to get rid of cellulite, or firm up the skin as I think that they are all things that you have to work for by physically doing something to change your body.  Saying this, I have got into such a routine of going to the gym now that (dare I say it...) I think I'm actually enjoying going, and it's no longer a chore.  This is something I'd love to try to accompany my exercise regime, and work alongside my workouts to help get rid of cellulite so I feel a little more confident getting my body out over Spring and Summer!  Even if it doesn't work, I love the glowy sheen you get from an oil, so I'd be happy as long as my skin was nourished!


How gorgeous does the Poudre Éclat Prodigieux look?  This bronzing powder looks so perfect and matte, that I think it would be ideal to bring a natural warmth to the skin.  A natural warmth is perfect, because you can gradually introduce some colour to your skin.  I usually stick with my MAC MSF in Give Me Sun, but I'd love to have a matte alternative.

And finally, it wouldn't be a very good Nuxe wishlist if I didn't include the notorious Rêve de Miel in my wishlist.  This pretty much is a cult classic, and I'm dying to try this little pot of goodness.  My lips are still a little neglected from the colder weather, and from what I have read about this product, my lips will be prepped and ready to be paired with a bright slick of lipstick in no time!

So there we have it!  My, rather large, Nuxe wishlist!  Don't forget that this post is part of a competition, and you can all enter the #NUXEPamperHamper competition by following the instructions here!  Also, if you fancy trying any of these products yourself, Escentual currently have an amazing discount on French Pharmacy including Nuxe!

Have you tried any of the products on my wishlist?

Wednesday 5 March 2014

Bioderma Sensibio H2O Solution Micellaire

The Bioderma H2O Solution Micellaire* is very much a cult classic.  Whilst not everybody may have tried it as it used to be quite difficult to get hold of, I could put my money on the fact that every beauty lover has heard of it.

Bioderma vs L'Oreal Skin Perfection Micellar Solution Review

We all should know by now that I am tight with my pennies, and Bioderma isn't the cheapest micellar water on the market right now.  A 250ml bottle would set you back £9.99 compared to say the £4.99 for 200ml the L'Oreal Skin Perfection 3 in 1 Micellar Solution.  But, and this is a big but, I honestly think you'd get more from a bottle of Bioderma than you would the L'Oreal.

Formula wise, the Bioderma feels so much lighter and does feel literally like water.  I didn't notice it at first, but the L'Oreal version almost feels thicker and slightly oilier than the Bioderma to the point that I feel like it almost leaves a film across my skin.  Not an uncomfortable "my skin feels disgusting" film, and as I said, I didn't notice it until I had the Bioderma to compare it to.  The Bioderma is so much more refreshing on the skin, and definitely effectively removes all traces of make up gently as well as leaving no trace of the solution itself behind.  There's no need to rinse Bioderma off, although I do tend to use it as a pre cleanse when removing my make up in the evening.  Bioderma does however recommend drying your skin after use with a clean towel, but I find that Bioderma air dries very quickly.

Onto the bottle.  Bioderma has your standard flip and click cap, but requires a little squeeze of the bottle for the product to come out.  You can really control how much product you get out, so that there is no wastage!  This particular bottle is lasting me forever, and I use it almost daily!  L'Oreals offering however has pretty much zero product control - it kind of just falls out of the bottle, and I find that my cotton pad is completely saturated with the solution so there is a lot of wastage, meaning that I have ploughed my way through bottles of this stuff.

Even though I find it hard to part with my money, I really think that I will be buying Bioderma from now on.  It's not that L'Oreal have a bad product, it's really effective and is a nice product to use, but it just doesn't cut it compared to Bioderma.  Bioderma lasts so much longer and you don't end up using as much on each use making it a bit of an investment purchase.

The Sensibio is for sensitive skin, as the name suggests, and I think that next time I will be looking into the Sebium version designed for oily skin.  You can find Bioderma on Escentual here!  Or if you want to try the L'Oreal version, it is available at most stores and supermarkets, but is currently in the Boots three for two offer here.  This post was supposed to be a sole review of Bioderma, but I thought a high street comparison would be much more effective at showing my point!  I hope you've enjoyed!

Have you tried Bioderma?  What do you think of the High Street alternatives?
*Bioderma H2O Solution Micellaire was sent to me as a PR sample.

Tuesday 4 March 2014

Nail Art Tutorial: Gobstopper Nails

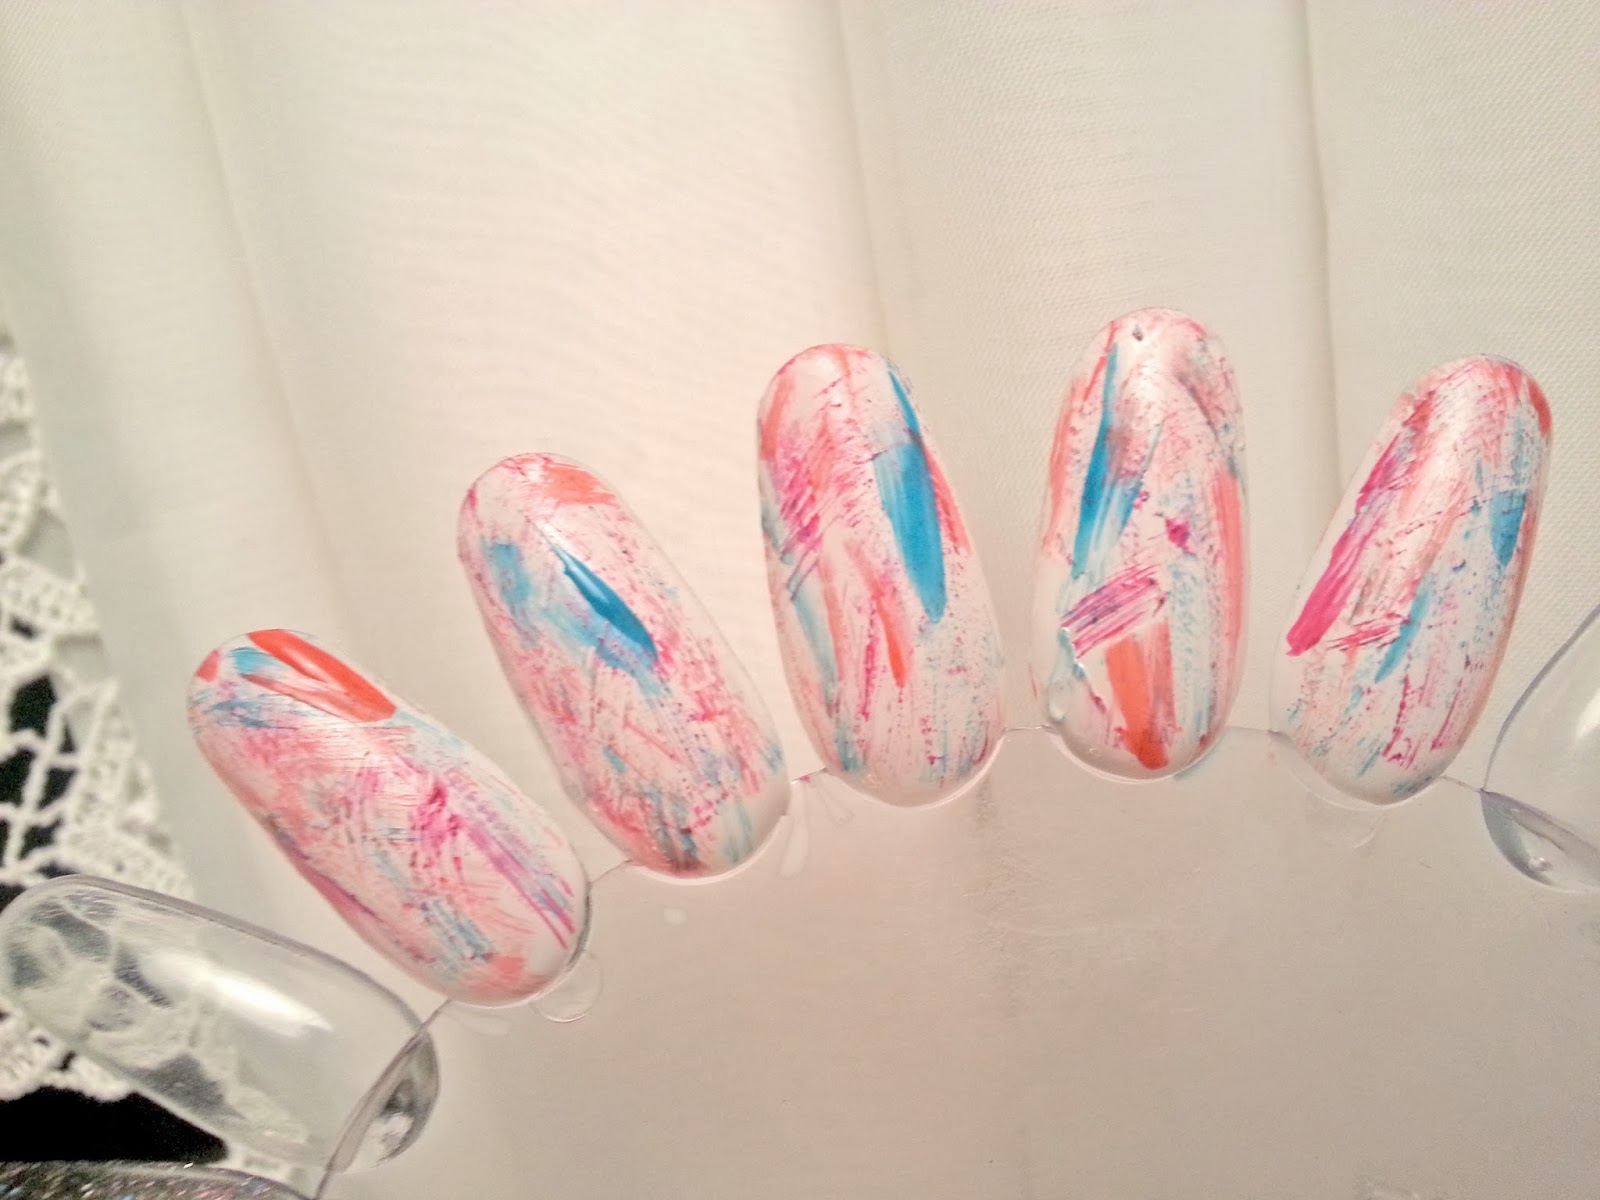
When I was having my super week off work, you might have spotted on my Instagram feed that I had dabbled in a little bit of nail art.  Now, I'm not an expert at all in the nail art department and have only just managed to get my nails to a nice enough length to have them painted full stop!  But I got quite a few likes and a lot of interest, so I thought I'd show you what I did and how I did it!

Easy Gobstopper Nail Art Tutorial

Easy Gobstopper Nail Art Tutorial

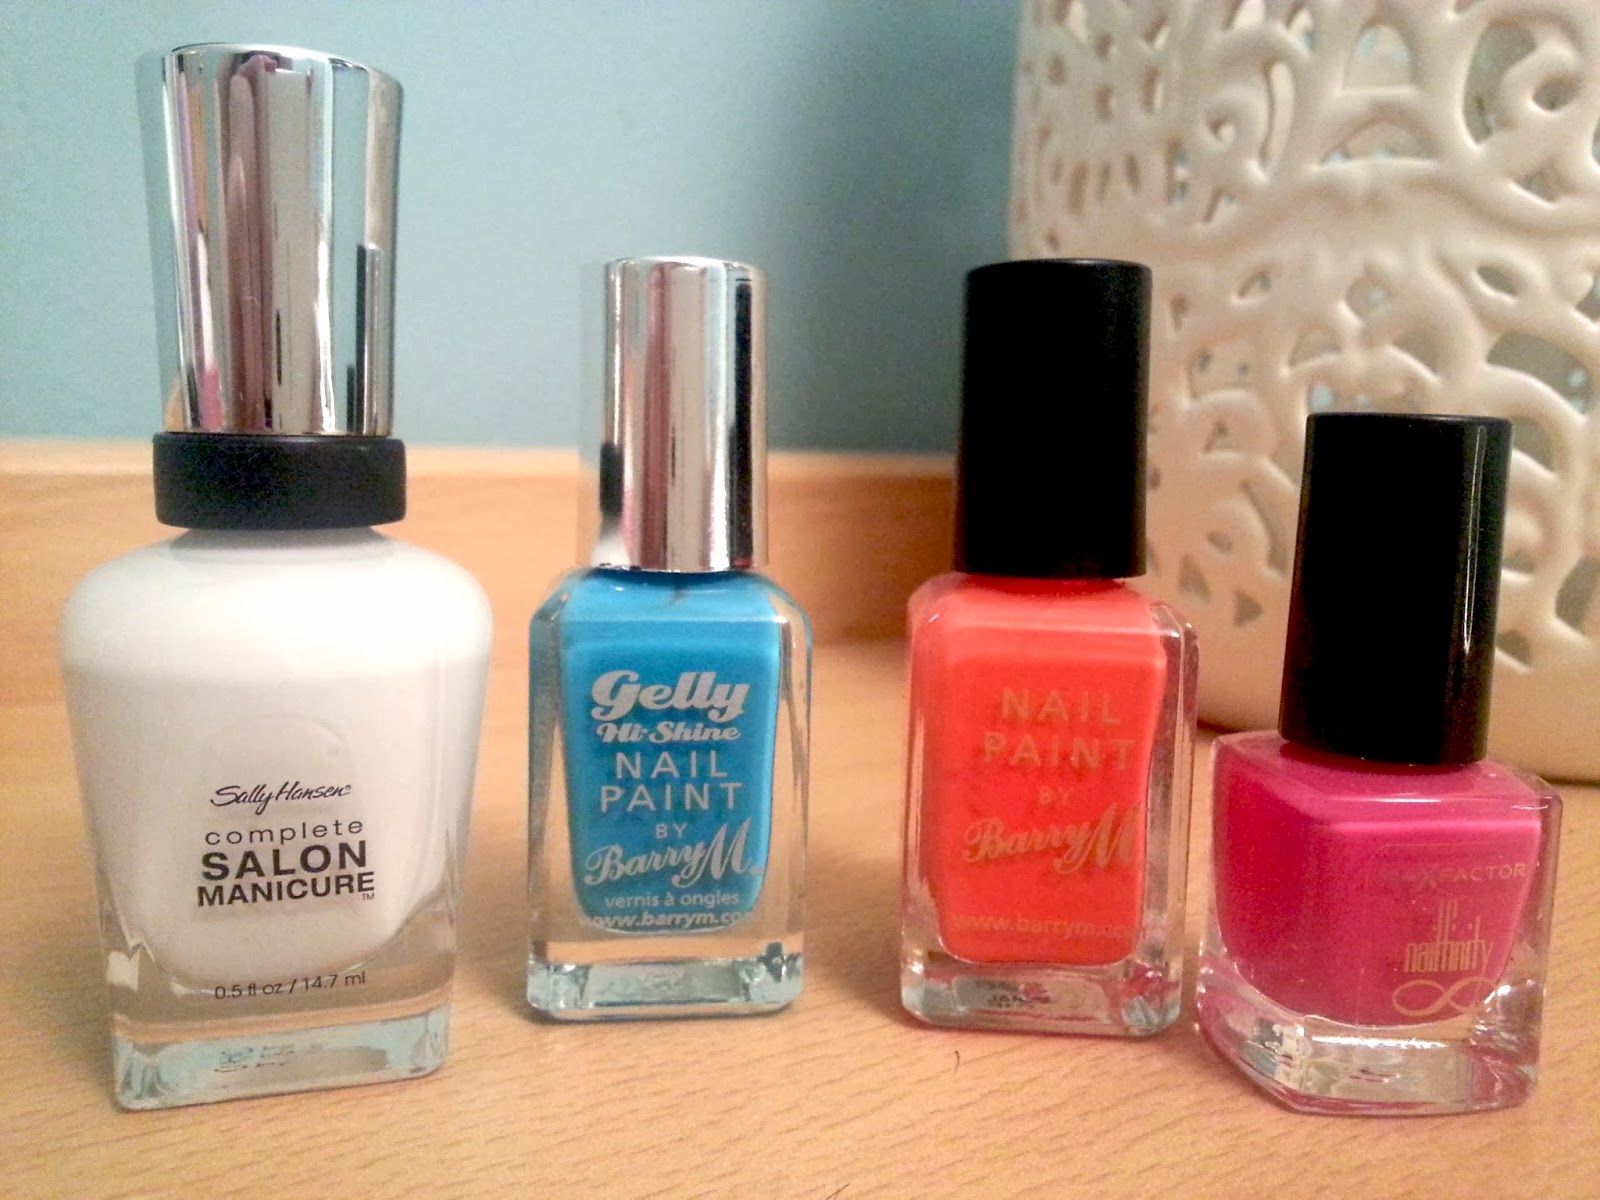
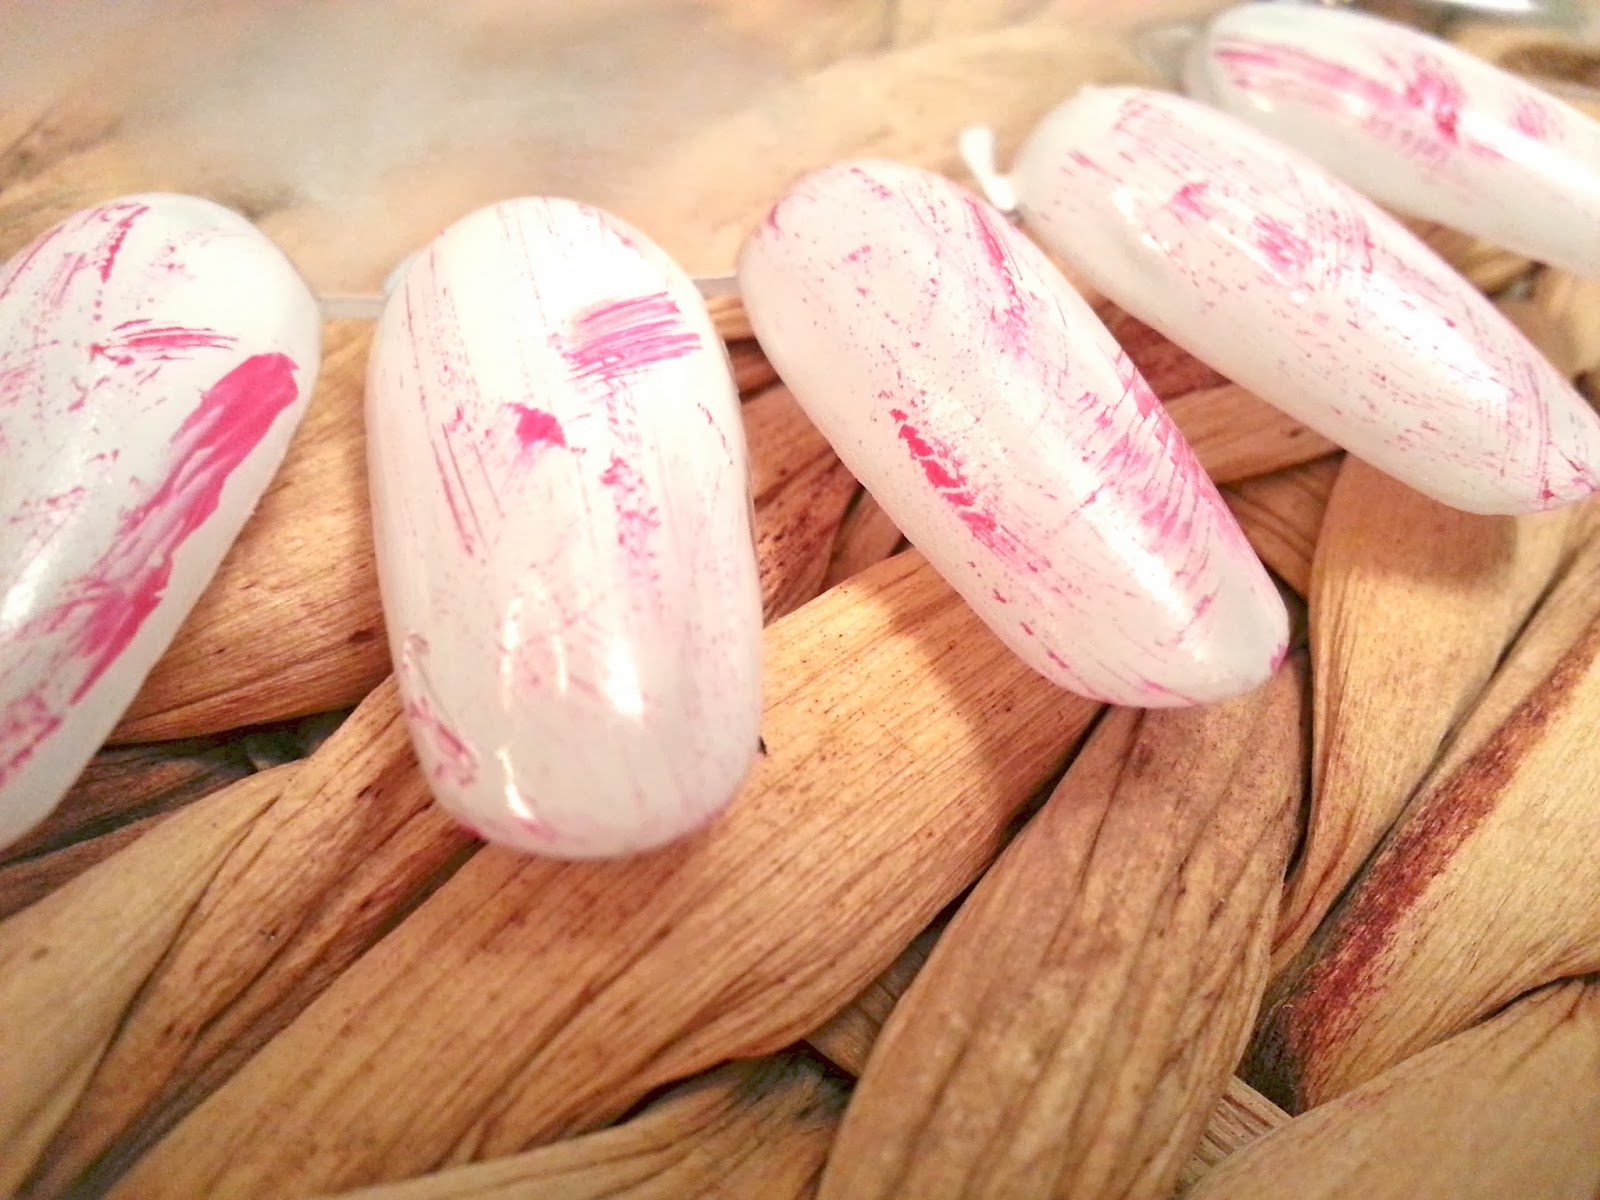
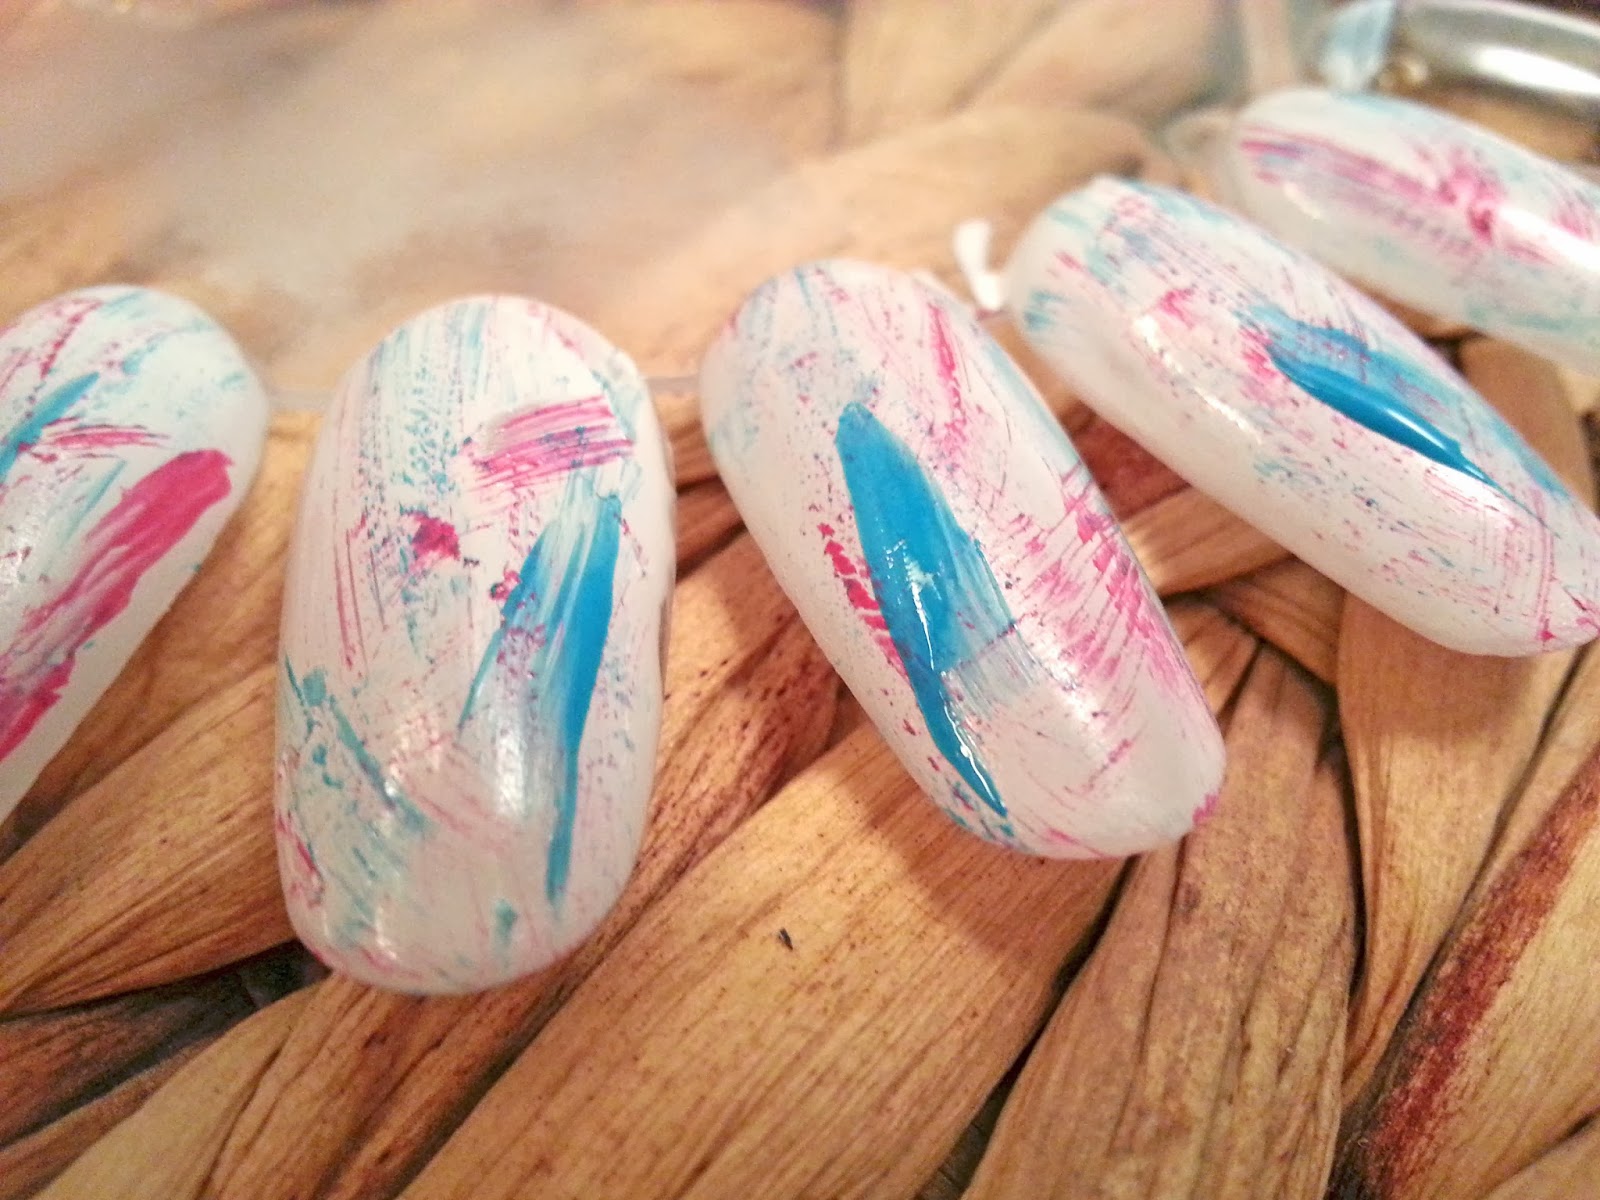
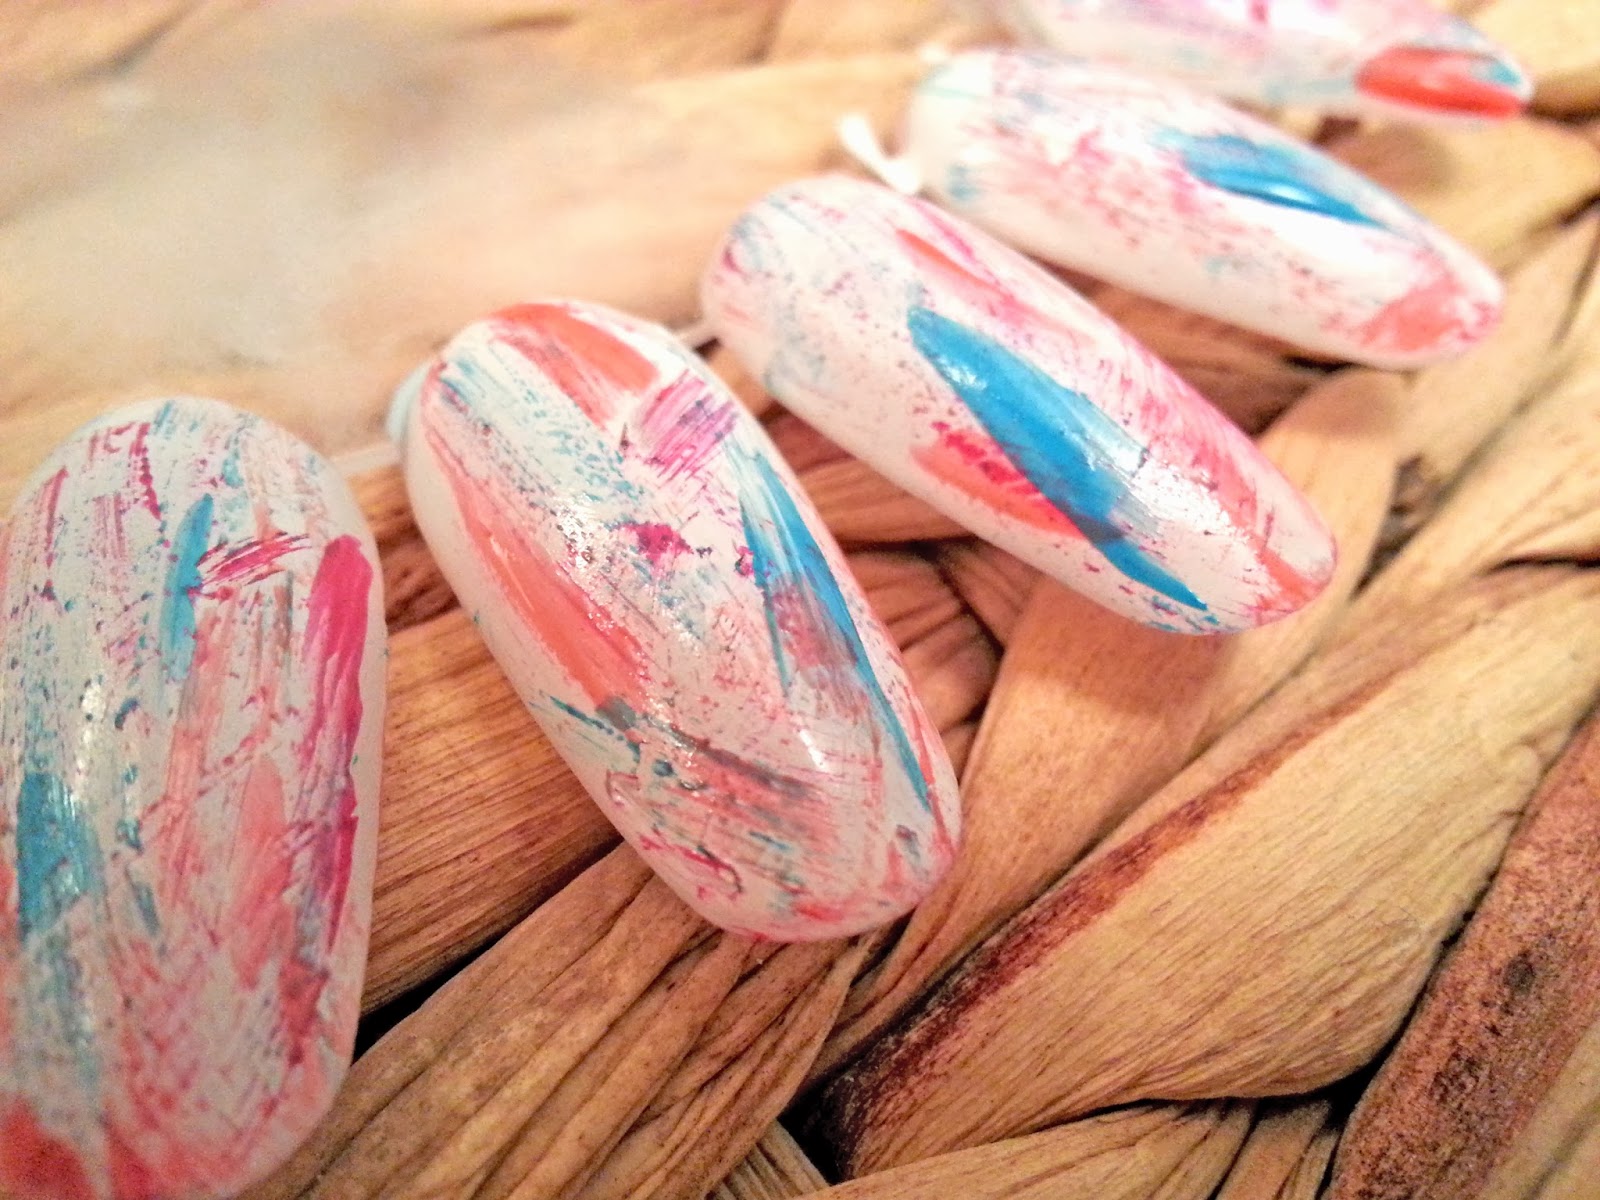
Now you could use this technique with any colours you fancied, but to make Gobstopper nails, I used Sally Hansen Lavender Cloud, Barry M Gelly in Guava, Barry M Nail Paint in Coral and Maxfactor Nailfinity in Disco Pink.

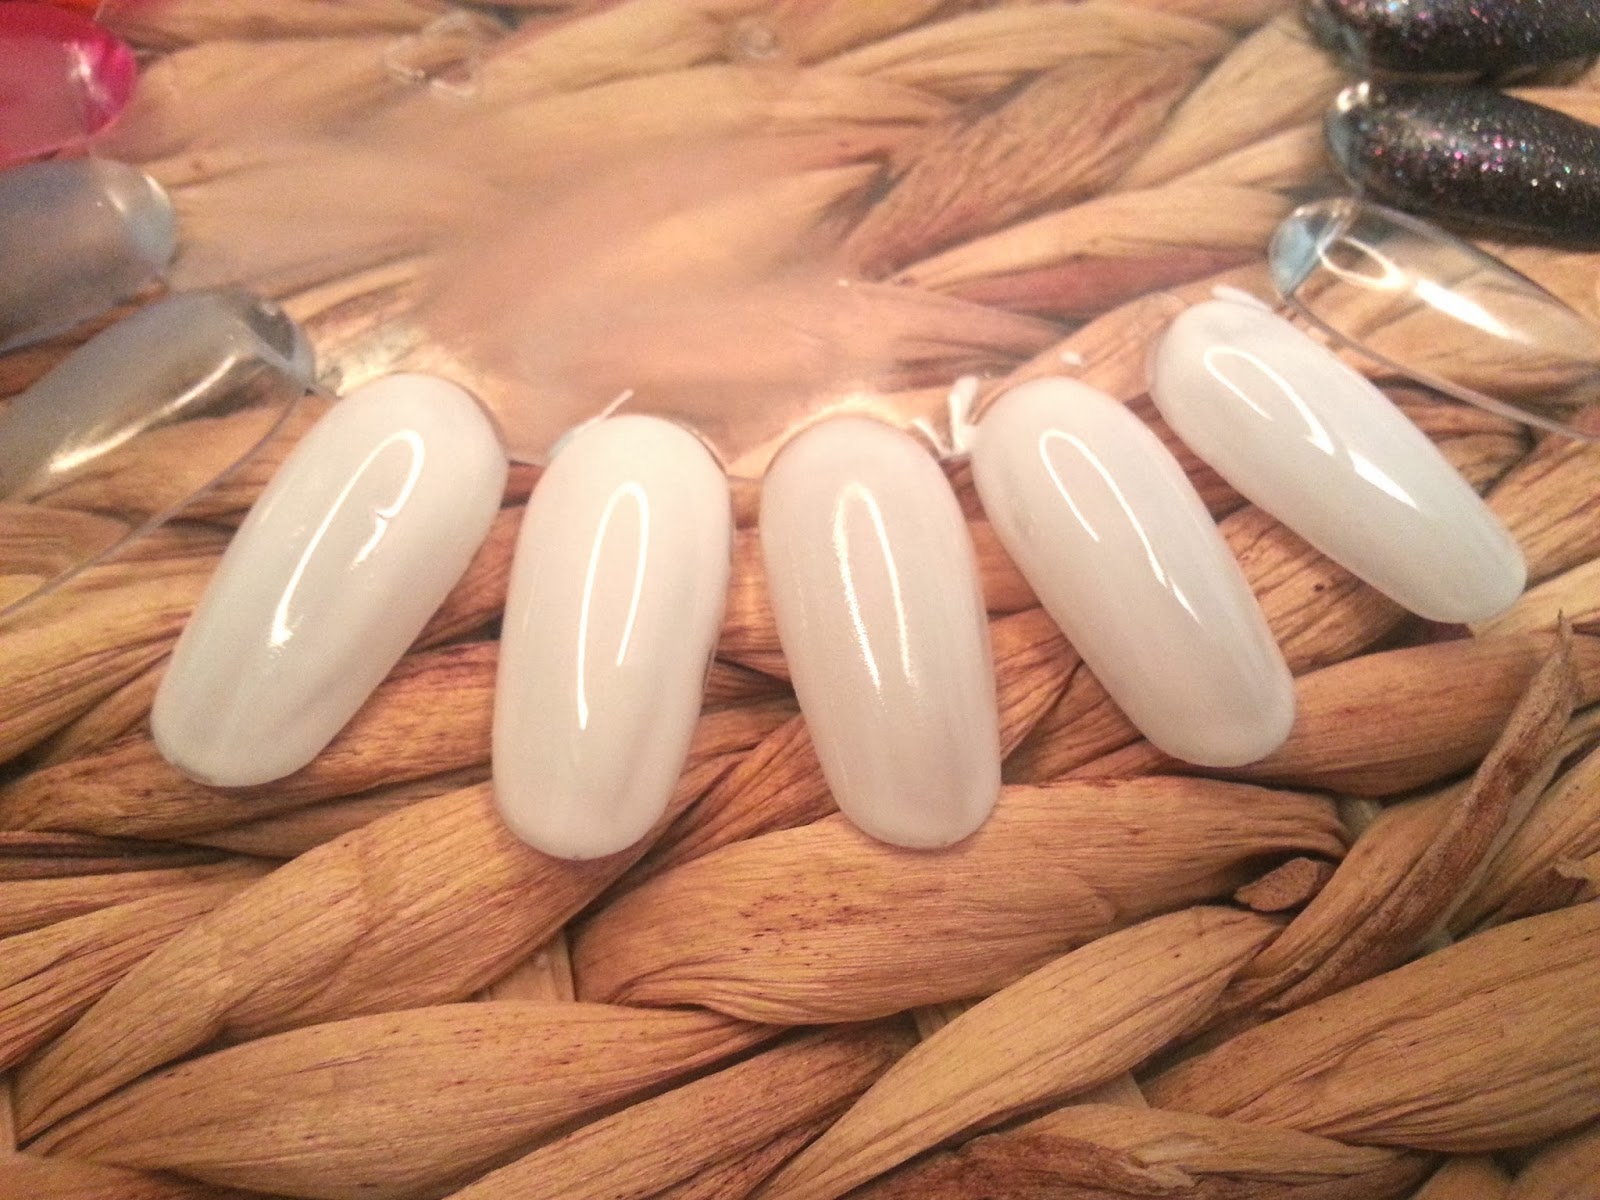
So, imagine you've done the hard bit.  Your nails are shaped and ready to go, your base coat is dry and you're ready to go with "doing" your nails.  I started with a white nail polish as my base shade.  I used my Sally Hansen Lavender Cloud, which is perfect for this nail art, as it's not a glaring bright white, it's a slight off white with the tiniest amount of lilac in!  Saying that though, a bright white would really help the next lot of shades pop.

Easy Gobstopper Nail Art Tutorial

Your white base doesn't have to be perfect, as it'll be covered with your gobstopper colours.  Don't worry if it's a little uneven in coverage, as chances are you won't be able to tell.  I only one coat of my white base, where as if I was wearing this shade on it's own, I would have probably done three.

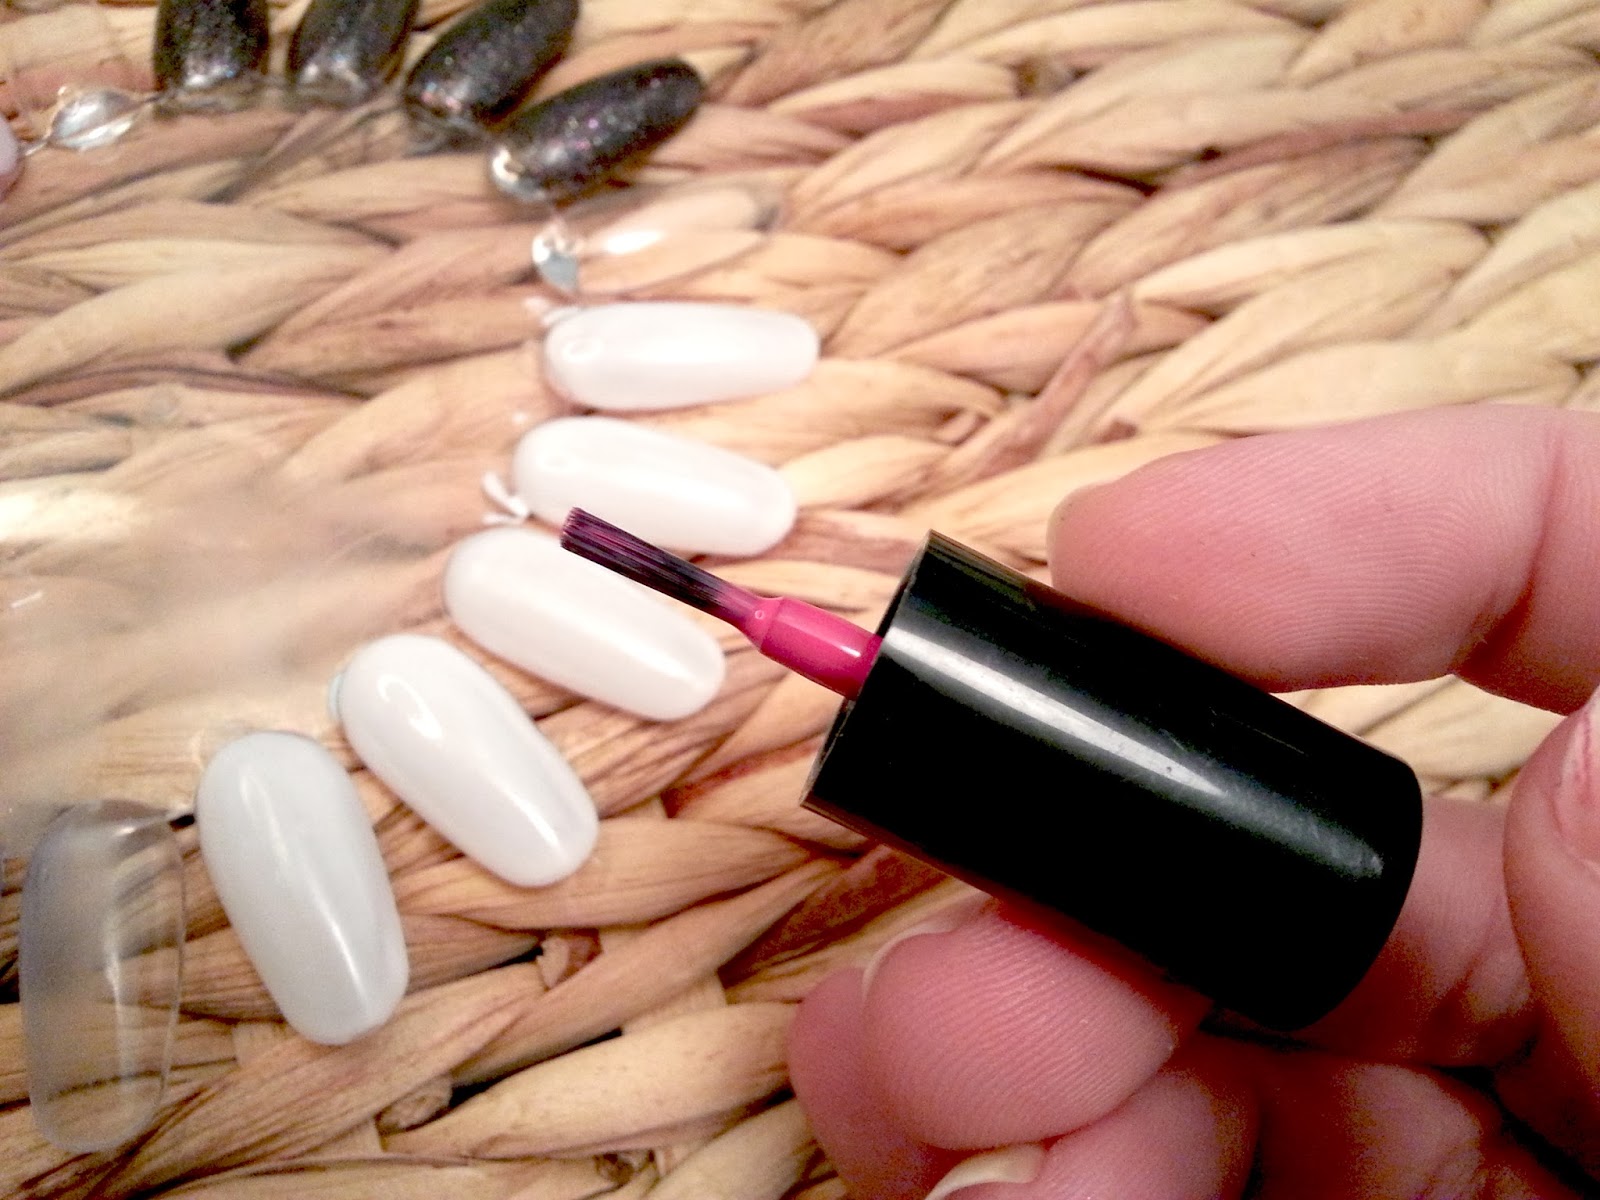
When applying the colour streaks, it's essential to have your nail brush with practically no paint on at all.  You will be dry brushing the colour on to get the streaky, edgy effect.  You can wipe excess off on the rim of the bottle, and to be extra careful, you can wipe it off onto some paper.  It's important to wait until your base colour is dry too, or you'll drag the tacky paint with your dry brush.

Easy Gobstopper Nail Art Tutorial

When applying the colour, just apply it where ever you fancy (technical nail art right here!), but make sure you can still see your white base, and are leaving some room for your other colours.

Easy Gobstopper Nail Art Tutorial

Because it's dry brushed on, it shouldn't take long to dry at all.  And the next steps are just to do exactly the same with your other two shades!  You can see on the Guava shade that some extra colour ran down the brush and made it not so dry anymore, but it's not the end of the world and just adds to the effect!

Easy Gobstopper Nail Art Tutorial Dry Brushing

Easy Gobstopper Nail Art Tutorial Dry Brushing

When you're happy with your finish, you can leave it as it is or apply a glossy top coat for a high shine gobstopper!  If you try this, don't forget to tag me in your Instagram pictures (@ceejayell_) or tweet me them over at @ceejayell_!

What do you think of this look?  Is it something you'll be trying out?